Ubuntu Server on the NVIDIA DGX Spark (Without the Desktop)
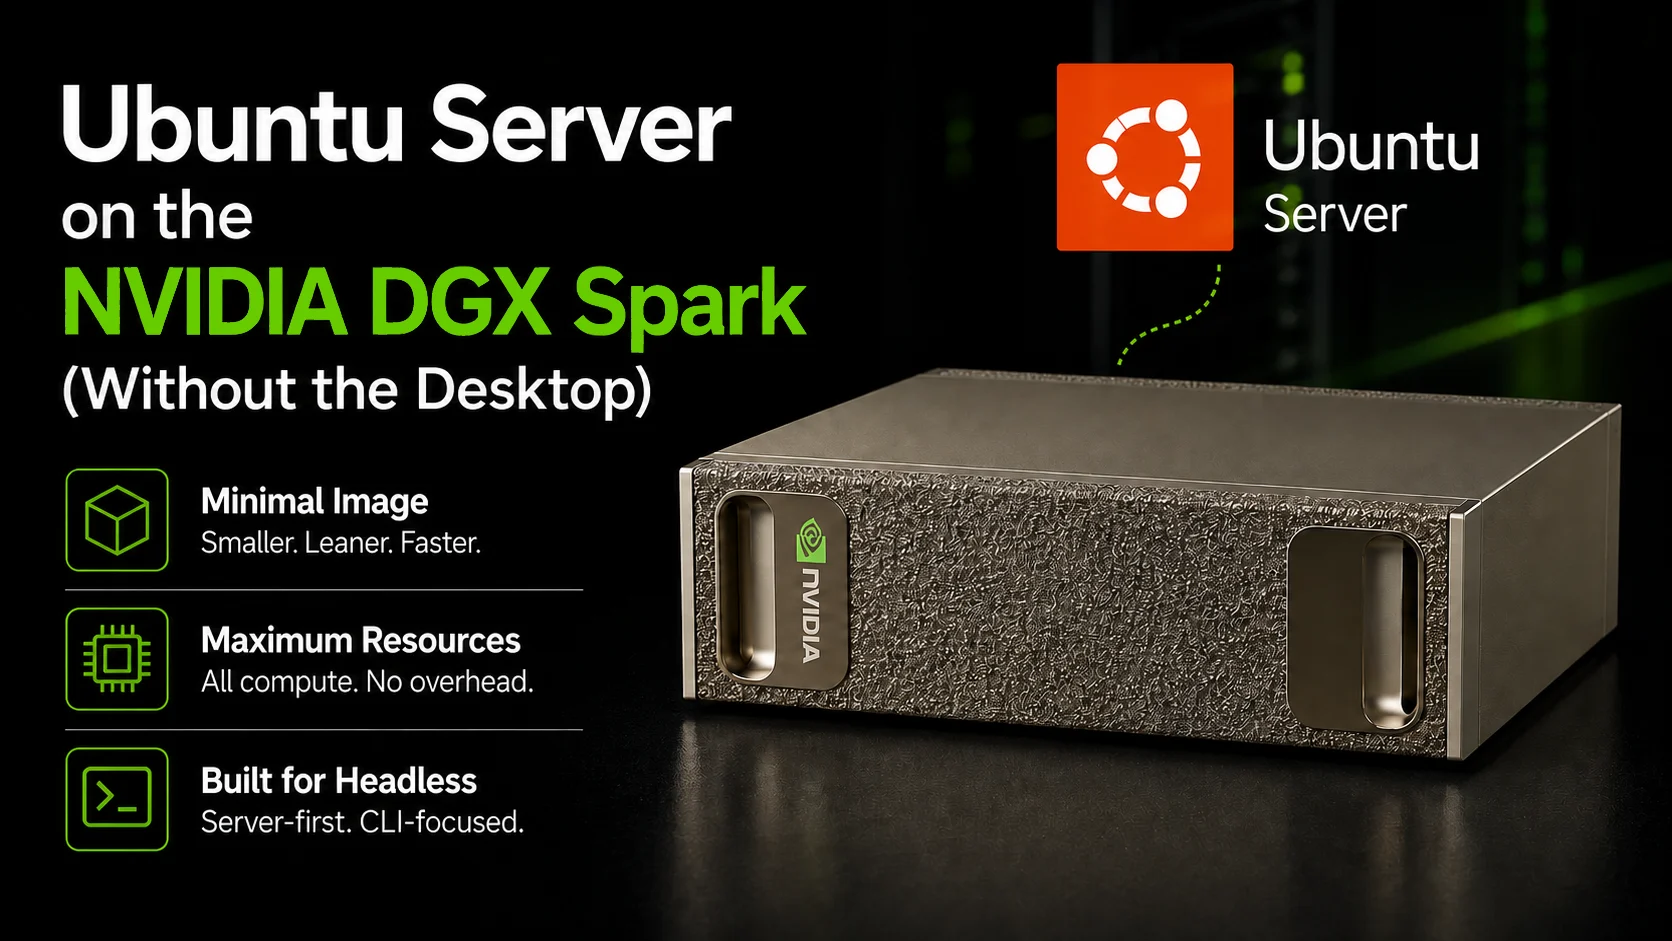
When you buy an NVIDIA DGX Spark or an ASUS Ascent GX10, it ships with DGX OS. DGX OS is NVIDIA’s managed Ubuntu image, and it is fine - if you want a full GNOME desktop on an AI box.
I did not want that.
The GB10 has 128 GB of unified memory shared between the CPU and GPU over NVLink-C2C. Every gigabyte the OS and desktop environment consume is a gigabyte not available to your model. On the DGX OS default image with GNOME idle, you are already down to around 116 GiB before you have loaded anything. With Ubuntu Server (minimized), you start with about 118 GiB - and the idle power draw drops by roughly 5-8 W too.
For 200B-parameter models, that memory is better spent on the workload.
So I put the process in one place: a clean Ubuntu 24.04 Server install with the same NVIDIA drivers, the same CUDA stack, and the same Docker + NVIDIA Container Toolkit, just without the desktop. It covers the Ubuntu install, ConnectX-7 networking, dual-node setup, and an Ansible playbook that takes over after the initial OS install.
The repo is at github.com/timothystewart6/ubuntu-gb10.
If your next step after the OS is serving models, I also have a GB10-focused vLLM image at github.com/timothystewart6/vllm-gb10 and the setup notes in Running the Latest vLLM on the NVIDIA DGX Spark.
What machines this covers
The GB10 Grace Blackwell Superchip shows up in a few different partner systems. The same setup applies to all of them:
- ASUS Ascent GX10 (used to write this guide)
- NVIDIA DGX Spark
- Lenovo ThinkStation GB10
- Dell, HP, MSI, Gigabyte, and other GB10 OEM systems
They all share the same ARM64 SoC. This is not x86_64. Every ISO, package URL, and repo reference here is for arm64 specifically. Mix in x86 packages and the failures get weird fast.
Why not just use the DGX OS installer
DGX OS is not bad. For a first-time GX10 owner, it is the lowest-friction path to a working NVIDIA stack. The drivers, CUDA, Docker, and the Container Toolkit are already there, and everything works out of the box.
The reasons I moved away from it:
Memory footprint. DGX OS ships with a full GNOME desktop. On a machine where the CPU and GPU share the same physical memory, that desktop costs you model capacity. Measured on identical GX10 units before loading a model, with the final row showing the practical desktop footprint avoided by the minimized Server path:
| System state | Memory impact before model load | Available for models |
|---|---|---|
| DGX OS 7 with GNOME idle | ~4.7 GiB | ~116 GiB |
| DGX OS 7 used as a desktop, with normal apps open | ~5.8 GiB | ~115 GiB |
| Ubuntu Server 24.04 minimized, with no desktop session | ~2.9 GiB | ~118 GiB |
| Desktop/app footprint avoided by the minimized Server path | Up to ~5.8 GiB of GNOME and desktop-app usage is not present | ~118 GiB available after the minimized Server base OS is running |
Xorg plus gnome-shell plus gnome-remote-desktop pulls about 340 MB of the shared GPU memory on its own, before you start doing any AI work.
Power draw. The GNOME desktop stack adds roughly 5-8 W at idle, measured at the wall. The savings are not enormous on a system that already idles at 40-45 W (the ConnectX-7 NIC alone accounts for about half of that), but they compound when the machine is running 24/7.
Update cadence. DGX OS updates on NVIDIA’s schedule. Ubuntu Server updates on Canonical’s LTS schedule plus NVIDIA’s own driver repositories, which you control independently.
Clean rebuilds. I also wanted a clean starting point if I ever needed to wipe the machine. I did not want to reinstall NVIDIA’s OS, update whatever tooling shipped with it, and then work back toward the setup I actually wanted. With the playbook, a rebuild starts from fresh Ubuntu Server and installs the current stack automatically.
Starting point. DGX OS 7 is based on Ubuntu 24.04 too. The difference is that this path starts from the minimized Ubuntu Server installer, then adds the NVIDIA stack intentionally instead of starting from NVIDIA’s full desktop image.
The NVIDIA stack you end up with
I based this on the same component versions as DGX OS 7.5.0 (June 2026). GB10 partner systems may trail the DGX Spark Founders Edition by a release or two, but the same packages apply.
| Component | Version |
|---|---|
| Ubuntu Base | 24.04 LTS (arm64) |
| Canonical Kernel | 6.17.0-1021-nvidia (HWE) - linux-nvidia-hwe-24.04 |
| NVIDIA GPU Driver | 580.167.08 (open kernel modules) |
| NVIDIA CUDA Toolkit | 13.0.2 |
| Docker CE | latest from NVIDIA repos |
| NVIDIA Container Toolkit | latest from NVIDIA repos |
| DOCA-OFED (ConnectX-7) | optional, via nvidia-system-mlnx-drivers |
Before you chase a phantom memory bug, know this about the GB10:
nvidia-smiwill showMemory-Usage: Not Supportedin the memory field. On unified memory (iGPU/UMA) platforms, the GPU and CPU share the same DRAM, so there is no dedicated VRAM pool to report. It is not an error.
Is this for you
If you just bought a GX10 or DGX Spark and want the path of least resistance, DGX OS is fine. NVIDIA has already done the work and it boots into a working GNOME environment with everything installed.
Tip: If you want to stay on DGX OS but disable the GNOME desktop without reinstalling, Paweł Stołowski shared a quick alternative:
sudo systemctl set-default multi-user.targetpermanently disables gdm and Xorg. You can re-enable the desktop at any time withsudo systemctl set-default graphical.target. It does not get you the minimized base or the reduced attack surface, but it is a fast way to drop the desktop entirely.
I would use this path when you want:
- To avoid up to ~5.8 GiB of GNOME and desktop-app memory footprint before your model starts
- No desktop environment consuming GPU memory on a machine built to run LLMs
- Fewer installed packages, which means less patching, less bloat, and less attack surface
- Control over update cadence - driver and kernel upgrades on your schedule
- A repeatable Ansible playbook you can run against multiple machines
- A minimized Ubuntu Server base instead of NVIDIA’s full desktop image
The NVIDIA stack you end up with is the same either way. The difference is how much of the 128 GB is actually available for your models when you get there.
Two paths: manual or Ansible
If you want the faster path, use the Ansible playbook in the repo. It starts from a fresh Ubuntu Server install, handles the rest of the setup, and only sends you back to the console for Secure Boot MOK enrollment.
I am keeping the manual steps here because they make the install easier to reason about, especially if you are setting up one machine and do not want Ansible in the mix.
Step 1 - Install Ubuntu Server (minimized, arm64)
You need the Ubuntu Server arm64 ISO, not the standard amd64 one. At the time of writing, the current release is 24.04.4.
1
2
3
4
5
6
# Download the arm64 ISO and the official checksum file
wget https://cdimage.ubuntu.com/releases/24.04/release/ubuntu-24.04.4-live-server-arm64.iso
wget https://cdimage.ubuntu.com/releases/24.04/release/SHA256SUMS

# Verify the download - should print: OK
echo "9a6ce6d7e66c8abed24d24944570a495caca80b3b0007df02818e13829f27f32  ubuntu-24.04.4-live-server-arm64.iso" | sha256sum --check
Write it to a USB drive and boot the GX10 from USB.
Warning: At the GRUB menu, select “Ubuntu Server with the HWE kernel” - not the default entry. The standard kernel fails to find the live filesystem on the GX10’s USB controller. If you see “Unable to find a medium containing a live file system”, reboot and select HWE. If HWE also fails, press
eon the HWE entry, find thelinuxline, appendrootdelay=30, and boot with Ctrl+X.
Info: In the installer, when asked for installation type, select “Ubuntu Server (minimized)” - not the default “Ubuntu Server”. I wanted to start with as little tooling as possible, then add only the pieces this machine actually needs. Fewer installed packages means less patching, less bloat, and less attack surface. Everything here works on the minimized install, and it keeps the machine focused on GPU workloads.
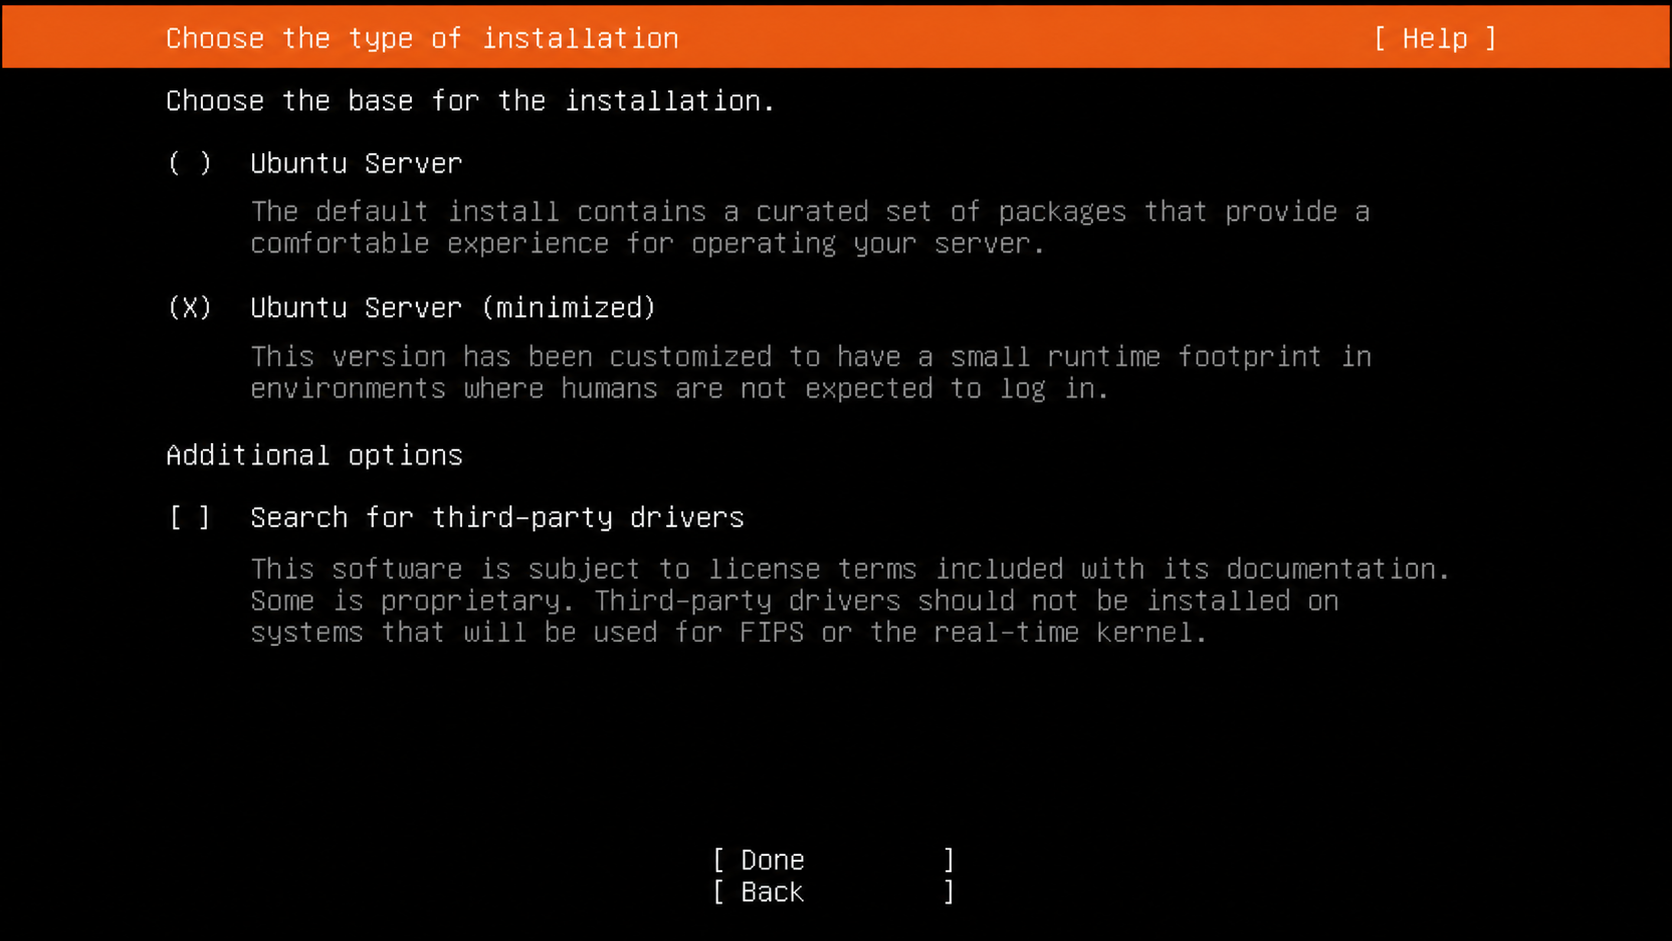 The minimized install option is the important choice here: start small, then add only the NVIDIA stack you need.
For storage, I used the whole disk and left LVM unchecked. Nothing in this setup needs a custom layout, and keeping storage boring makes rebuilds easier.
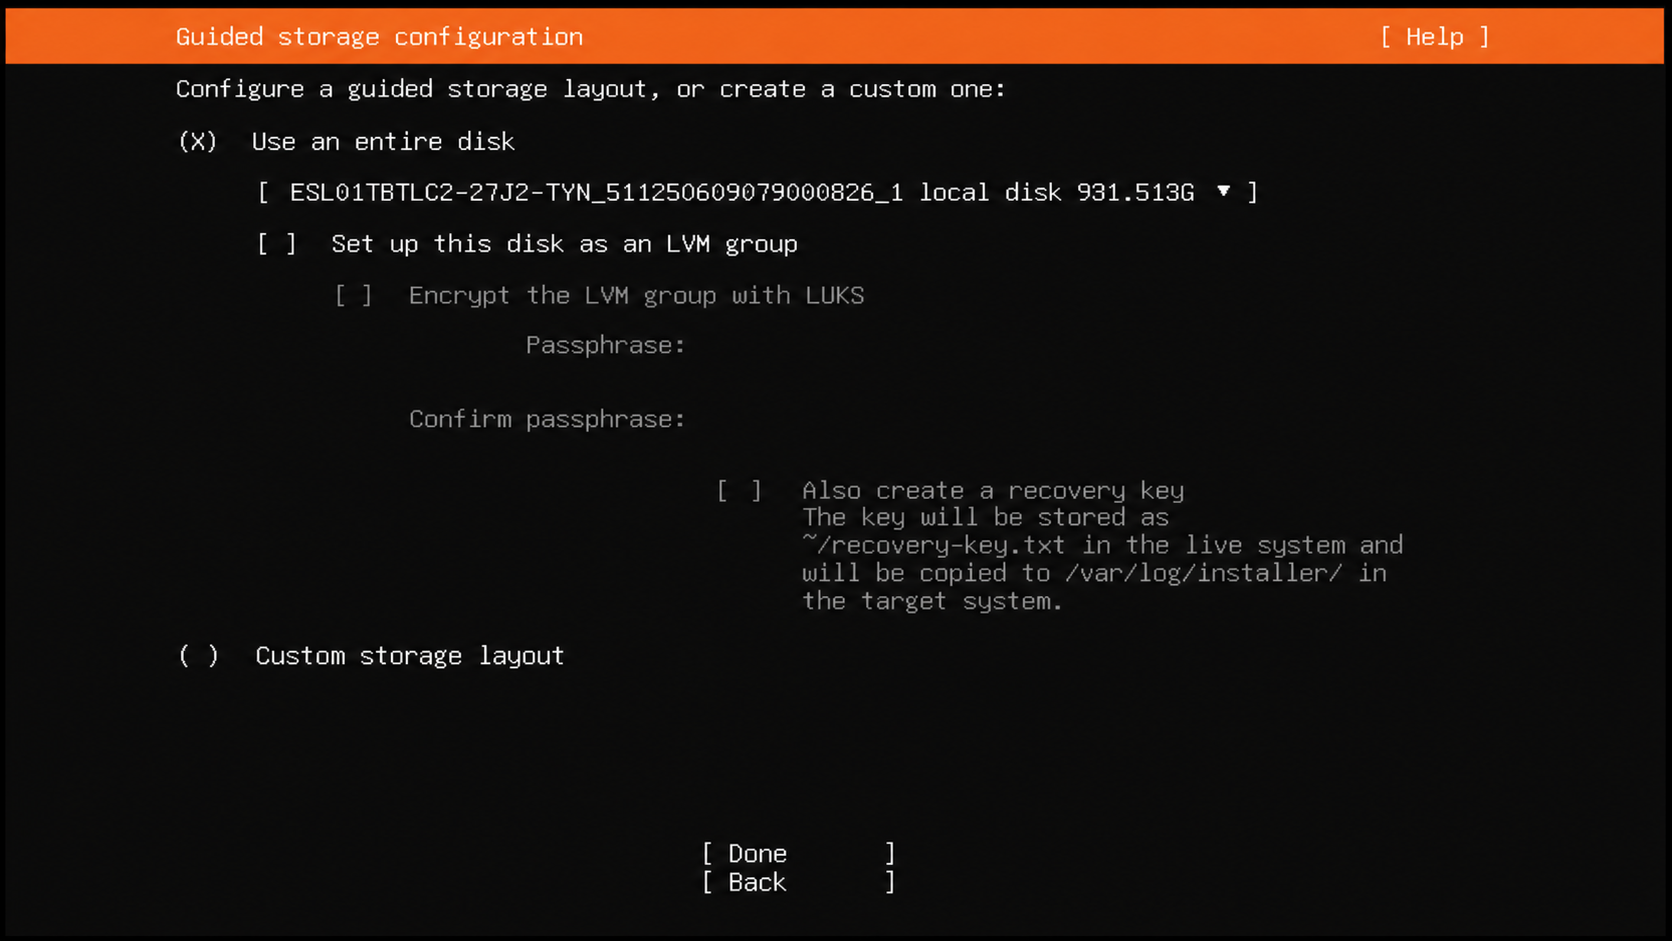 A simple whole-disk layout is enough for this build.
Install OpenSSH server during setup, especially if you plan to use the Ansible path later. Importing a GitHub SSH key here also saves a little console work after first boot.
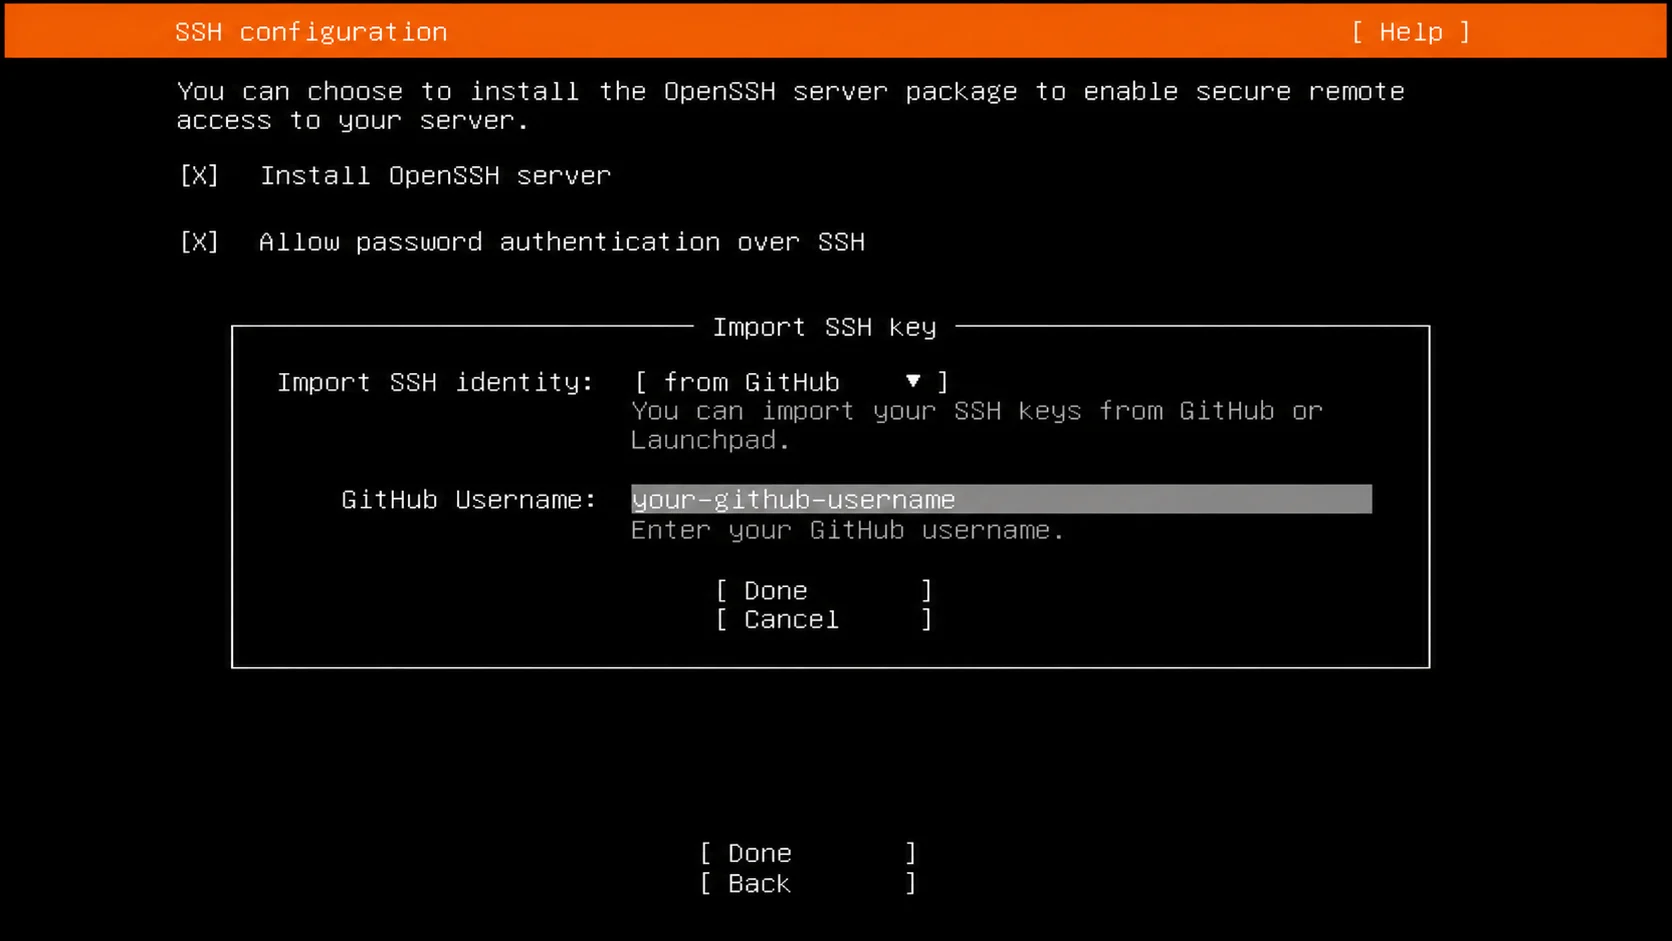 Install OpenSSH during setup so the rest can be finished over the network.
Warning: At the snap step, do not install Docker from snap. Docker CE comes from apt later. Leave all snaps unselected.
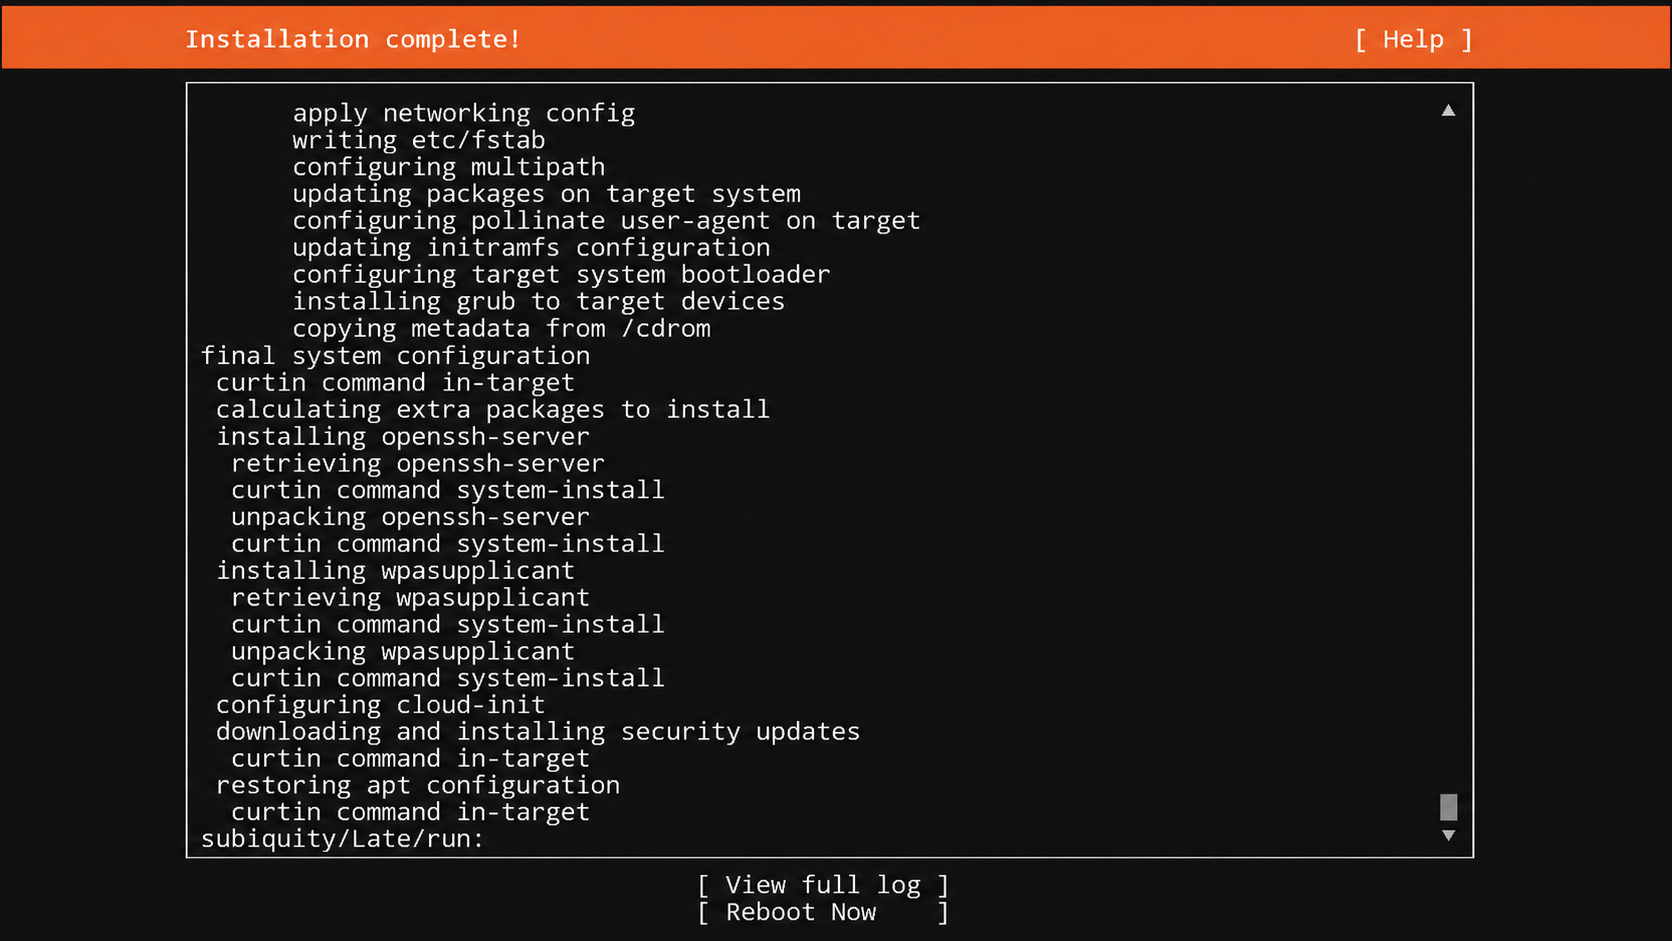 Once the installer finishes, reboot into the newly installed server image.
After reboot, the installed system should land at a plain server login prompt.
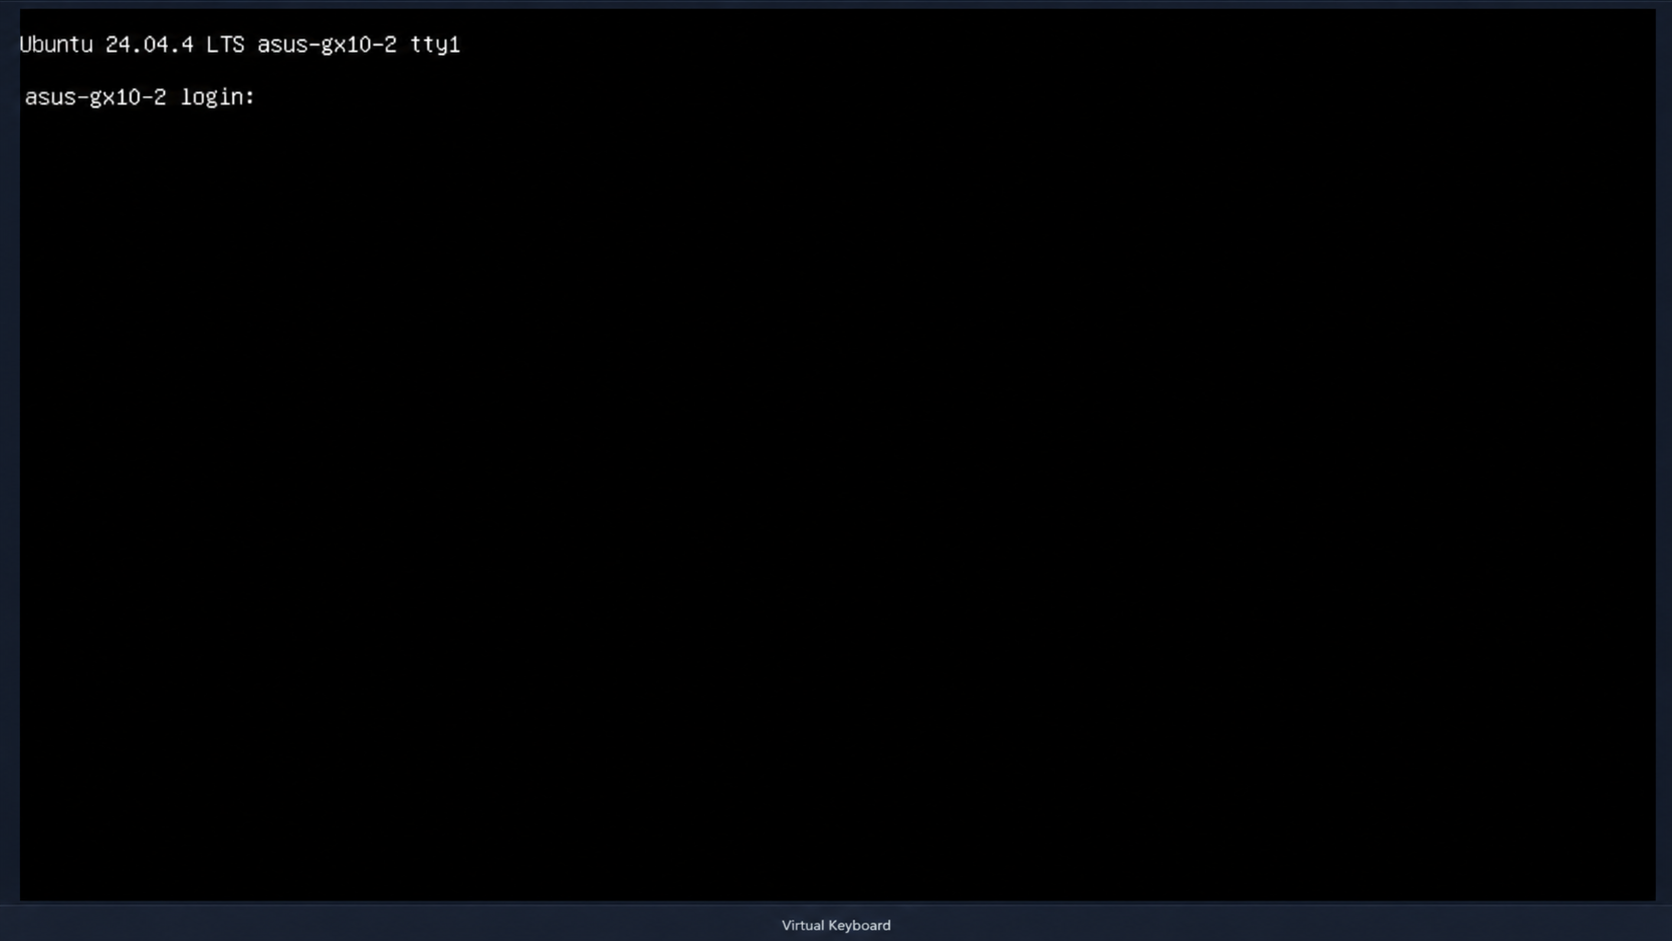 First boot should land at a plain server login prompt, which is the whole point.
Once you are logged in, the GX10’s network interface name in the installed system often differs from what the live installer detected. Check and fix it if needed:
1
2
3
4
5
6
# Find the actual interface name on the installed system
ip a

# Fix the netplan config if the name doesn't match
sudo sed -i 's/<old-name>/<new-name>/' /etc/netplan/50-cloud-init.yaml
sudo netplan apply
Step 2 - Critical Stability Fix: SBSA Watchdog
Danger: Apply this before doing anything else. Without it, GB10 / DGX Spark systems hard-reset on a precise ~20-minute cycle from first boot - even completely idle, no GPU workload, no Docker. The reboot leaves no kernel panic, no Xid, no pstore trace. The only signature is the metronome-exact interval.
What is happening
The GB10 firmware arms a 2-stage ARM SBSA Generic Watchdog at boot and expects the OS to take ownership of it. If nothing services the watchdog, the hardware fires and force-resets the machine. Each stage is ~10 minutes, so you get a hard reset every ~20 minutes like clockwork.
There are two independent failure modes that together prevent sbsa_gwdt from loading at boot. You need to understand both to fix it correctly.
Failure mode 1 - systemd-modules-load enforces the blacklist via libkmod
The linux-hwe-6.17 kernel package ships:
1
/usr/lib/modprobe.d/blacklist_linux-hwe-6.17_<uname-r>.conf
containing blacklist sbsa_gwdt. The systemd-modules-load service uses the libkmod C API, which enforces blacklists even for explicit module-name loads. Adding sbsa_gwdt to /etc/modules-load.d/ silently does nothing. The blacklist is reinstalled on every kernel update.
Failure mode 2 - the initramfs approach also fails
update-initramfs bundles the entire /usr/lib/modprobe.d/ tree - including the blacklist - INTO the initramfs image. When the initramfs init script processes modules from conf/modules using modprobe, it finds the bundled blacklist and refuses. The module file is included in the image but never loaded.
The fix - two layers
Layer 1: initramfs init-premount script using insmod
insmod loads a kernel module directly and bypasses all kmod configuration, including blacklists:
1
2
3
4
5
6
7
8
9
10
11
12
13
14
15
16
# Include the module in the initramfs image
echo 'sbsa_gwdt' | sudo tee -a /etc/initramfs-tools/modules

# Create an init-premount script that uses insmod instead of modprobe
sudo tee /etc/initramfs-tools/scripts/init-premount/sbsa_gwdt > /dev/null << 'HOOK'
#!/bin/sh
PREREQ=""
prereqs() { echo "$PREREQ"; }
case $1 in prereqs) prereqs; exit 0;; esac
ko=$(find /usr/lib/modules/$(uname -r)/kernel/drivers/watchdog/ \
     -name 'sbsa_gwdt.ko*' 2>/dev/null | head -1)
[ -n "$ko" ] && insmod "$ko" 2>/dev/null || true
HOOK
sudo chmod 0755 /etc/initramfs-tools/scripts/init-premount/sbsa_gwdt

sudo update-initramfs -u -k all
Layer 2: systemd service using the modprobe binary
The modprobe binary (unlike the libkmod C API) treats blacklist as a soft blacklist and bypasses it for explicit module-name loads. A one-shot service that runs after systemd-modules-load has already failed:
1
2
3
4
5
6
7
8
9
10
11
12
13
14
15
sudo tee /etc/systemd/system/sbsa-watchdog-load.service > /dev/null << 'SVC'
[Unit]
Description=Load SBSA watchdog driver (bypass linux-hwe kernel package blacklist)

[Service]
Type=oneshot
ExecStart=/sbin/modprobe sbsa_gwdt
RemainAfterExit=yes

[Install]
WantedBy=multi-user.target
SVC

sudo systemctl daemon-reload
sudo systemctl enable --now sbsa-watchdog-load.service
Warning: Do NOT add
Before=basic.targetto the service unit. systemd detects an ordering cycle and silently drops the start job - the module never loads.WantedBy=multi-user.targetis sufficient; the system reaches multi-user well within the 20-minute window.
Load it right now without rebooting:
1
sudo modprobe sbsa_gwdt
Verify it loaded:
1
2
3
systemctl is-active sbsa-watchdog-load.service   # -> active
lsmod | grep sbsa_gwdt                           # -> sbsa_gwdt  20480  1
cat /sys/class/watchdog/watchdog0/identity       # -> SBSA Generic Watchdog
The machine will now run past the 20-minute mark. The 10s hardware timeout stays active as a real hang-recovery mechanism - a genuine kernel freeze still resets the box.
Step 3 - NVIDIA Repos, Kernel, Driver, and CUDA
From here on, use NVIDIA’s official ARM64 repositories for the DGX Spark. One tarball installs all the APT sources and GPG keyrings:
1
2
3
curl https://repo.download.nvidia.com/baseos/ubuntu/noble/arm64/dgx-repo-files.tgz \
  | sudo tar xzf - -C /
sudo apt update && sudo apt upgrade -y
Install the core NVIDIA system metapackages. These bundle the DGX-derived platform tuning, monitoring tools, and the driver infrastructure:
1
sudo apt install -y nvidia-system-core nvidia-system-utils
Info:
nvidia-system-extrapulls in Docker CE and the NVIDIA Container Toolkit as dependencies. If you want to manage Docker installation separately, skip the next command and install Docker in Step 3 instead.
1
sudo apt install -y nvidia-system-extra
Warning: Do NOT install
nvidia-system-station- that pulls in a full GNOME desktop environment. This is a server.
Install the Linux perf tools and peermem loader:
1
sudo apt install -y linux-tools-nvidia-hwe-24.04 nvidia-peermem-loader
Install and boot into the HWE kernel before installing the driver:
1
2
sudo apt install -y linux-nvidia-hwe-24.04
sudo reboot
After reboot, confirm the kernel:
1
2
uname -r
# Expected: 6.17.0-1021-nvidia
Install the driver. Blackwell (GB10) requires the 580 family or newer, and requires the open kernel modules. The --allow-downgrades flag handles any version conflicts with packages already pulled in by the metapackages:
1
2
3
4
5
6
7
sudo apt install -y nvidia-driver-pinning-580
sudo apt install -y --allow-downgrades \
  nvidia-driver-580-open \
  libnvidia-nscq \
  nvidia-modprobe \
  datacenter-gpu-manager-4-cuda13 \
  nv-persistence-mode
Warning: Do NOT install
nvidia-fabricmanager- that is for DGX systems with NVSwitch hardware. The GX10 does not have NVSwitch.
Enable the persistence daemon and DCGM before rebooting:
1
2
sudo systemctl enable --now nvidia-persistenced nvidia-dcgm
sudo reboot
After the second reboot, install CUDA and configure the PATH:
1
2
3
4
5
6
sudo apt install -y cuda-toolkit-13-0

sudo tee /etc/profile.d/cuda.sh > /dev/null << 'CUDACONF'
export PATH=/usr/local/cuda/bin:$PATH
export LD_LIBRARY_PATH=/usr/local/cuda/lib64:${LD_LIBRARY_PATH}
CUDACONF
Verify the driver and CUDA loaded:
1
nvidia-smi
Expected output on GB10 (UMA platform):
1
2
3
4
5
6
7
8
9
+-----------------------------------------------------------------------------------------+
| NVIDIA-SMI 580.167.08             Driver Version: 580.167.08     CUDA Version: 13.0     |
+-----------------------------------------+------------------------+----------------------+
| GPU  Name                 Persistence-M | Bus-Id          Disp.A | Volatile Uncorr. ECC |
| Fan  Temp   Perf          Pwr:Usage/Cap |           Memory-Usage | GPU-Util  Compute M. |
|=========================================+========================+======================|
|   0  NVIDIA GB10                    On  | 0000000F:01:00.0   Off |                  N/A |
| N/A   40C    P8               5W /  N/A |       Not Supported    |   0%      Default    |
+-----------------------------------------+------------------------+----------------------+
Info:
Memory-Usage: Not Supportedis expected - no dedicated VRAM to report on a UMA platform.Persistence-M: Onconfirms the persistence daemon is running.
1
2
source /etc/profile.d/cuda.sh
nvcc --version
Step 4 - Docker + NVIDIA Container Toolkit
If nvidia-system-extra already pulled in Docker CE and the NVIDIA Container Toolkit, skip the package install block below. You still need to add your user to the docker group and configure the NVIDIA container runtime.
Otherwise:
1
2
3
sudo apt install -y docker-ce docker-ce-cli containerd.io docker-buildx-plugin docker-compose-plugin
sudo apt install -y nvidia-container-toolkit nv-docker-options
sudo systemctl enable --now docker
If you want to run Docker without sudo, add your user to the docker group. Log out and back in for the group change to apply, or use newgrp docker in the current session:
1
2
sudo usermod -aG docker $USER
newgrp docker
Configure the NVIDIA container runtime and set it as the default. On a dedicated GPU server, setting NVIDIA as the default runtime means you do not need to add --runtime=nvidia on every docker run. You should still use --gpus=all when you want a container to access the GPU devices.
Warning: This replaces
/etc/docker/daemon.json. If you already have custom Docker daemon settings, merge thedefault-runtimeandruntimesentries manually instead of pasting over the file.
1
2
3
4
5
6
7
8
9
10
11
12
sudo tee /etc/docker/daemon.json > /dev/null << 'DOCKERCONF'
{
    "default-runtime": "nvidia",
    "runtimes": {
        "nvidia": {
            "args": [],
            "path": "nvidia-container-runtime"
        }
    }
}
DOCKERCONF
sudo systemctl restart docker
Secure Boot MOK enrollment (required if Secure Boot is on)
The NVIDIA kernel modules are built by DKMS and must be signed for Secure Boot. Check whether the key is enrolled:
1
sudo mokutil --test-key /var/lib/shim-signed/mok/MOK.der
If the output says “is not enrolled”, queue it:
1
2
3
sudo mokutil --import /var/lib/shim-signed/mok/MOK.der
# Set a one-time password when prompted - you will need it once at the next boot
sudo reboot
Warning: Watch the console immediately after POST. A blue “Perform MOK management” screen appears before GRUB with a ~10 second timeout. Select Enroll MOK, enter your password, and reboot.
After the MOK reboot, verify the driver loads:
1
2
nvidia-smi
# Shows GPU info = driver loaded and signed correctly
Verify GPU access from inside a container:
1
2
docker run --gpus=all --rm ubuntu:24.04 bash -c "ls /dev/nvidia*"
# Should show /dev/nvidia0, /dev/nvidiactl, /dev/nvidia-uvm
Step 5 - Remove nvsm (important for standalone systems)
The NVIDIA repos pull in nvsm, a DGX datacenter fleet management stack. On a standalone non-DGX system, nvsm-core and nvsm-api-gateway crash-loop continuously and notifier_nvsm spins in a Python loop consuming ~14% CPU at idle. Remove it:
1
2
sudo apt-get purge -y nvsm
sudo systemctl reset-failed
Warning: On a standalone server, I would remove
nvsm. Otherwise you are leaving a CPU drain and a noisy failure source behind.
Step 6 - Optional: ConnectX-7 / DOCA-OFED
The GX10 has an NVIDIA ConnectX-7 NIC built in. If you plan to link two GX10s together for multi-node inference, you need the DOCA-OFED drivers:
1
2
3
sudo apt install -y doca-bos8-latest-repo nvidia-repo-keys
sudo apt update && sudo apt full-upgrade -y
sudo apt install -y nvidia-system-mlnx-drivers
Verify the driver loaded:
1
2
lsmod | grep mlx5
ibdev2netdev
Two GX10s connected via QSFP give you a 200 Gbps direct NCCL transport link. I use that link for the two-node vLLM Ray cluster in my other post, and DOCA-OFED is what makes the inter-node bandwidth fast enough to matter.
Tip: this step is now automated by the
doca_ofedAnsible role - runansible-playbook site.yml --tags doca_ofedinstead of the commands above. The role detects the ConnectX-7 NIC (skipping itself if absent) and reboots automatically to load the new kernel modules. I added this after finding one of my two GX10s never got DOCA-OFED installed by hand, so it silently missed OFED/firmware updates that the other node picked up.
Step 7 - Optional: performance tuning
A few settings that matter for a dedicated inference server:
CPU frequency governor. The GB10’s 20-core Grace CPU has 10 efficiency cores (max 2808 MHz) and 10 performance cores (max 3900 MHz). Dynamic scaling works well, but for inference you want cores at max immediately:
1
2
3
sudo apt install -y cpufrequtils
echo performance | sudo tee /sys/devices/system/cpu/cpu*/cpufreq/scaling_governor
echo 'GOVERNOR=performance' | sudo tee /etc/default/cpufrequtils
Swappiness. The GB10 has 128 GB of unified memory. Prevent the kernel from swapping aggressively:
1
2
echo 'vm.swappiness=10' | sudo tee /etc/sysctl.d/99-gb10.conf
sudo sysctl -p /etc/sysctl.d/99-gb10.conf
Disable automatic updates. Surprise kernel or driver updates will disrupt inference sessions:
1
2
sudo apt-get purge -y unattended-upgrades
sudo systemctl disable --now apt-daily.timer apt-daily-upgrade.timer
Firmware updates. NVIDIA uses fwupd for GB10 platform firmware. Run it after the initial setup:
1
2
sudo apt install -y fwupd
sudo fwupdmgr refresh && sudo fwupdmgr get-updates
Disable Wi-Fi. The GX10 has a MediaTek Wi-Fi adapter (wlP9s9). On a hardwired server, I turn it off:
1
2
echo 'SUBSYSTEM=="net", ACTION=="add", KERNEL=="wlP9s9", RUN+="/sbin/ip link set %k down"' | \
  sudo tee /etc/udev/rules.d/99-disable-wifi.rules
Step 8 - Dual-node ConnectX-7 interconnect
Two GX10s can be directly connected via QSFP cable across their ConnectX-7 ports for a 200 Gbps direct link. That link is what enables multi-node vLLM with tensor parallelism across both machines.
Configure both CX-7 ports with link-local IPv4 on both nodes:
1
2
3
4
5
6
7
8
9
10
11
sudo tee /etc/netplan/40-cx7.yaml > /dev/null << 'NETCONF'
network:
  version: 2
  ethernets:
    enp1s0f0np0:
      link-local: [ ipv4 ]
    enp1s0f1np1:
      link-local: [ ipv4 ]
NETCONF
sudo chmod 600 /etc/netplan/40-cx7.yaml
sudo netplan apply
After applying, check which interface shows Up in ibdev2netdev output and use that for your NCCL environment variables.
For the full NCCL bandwidth test procedure and SSH key exchange between nodes, see docs/07-dual-node.md in the repo.
The Ansible automation path
For a fresh Ubuntu Server install, the Ansible roles are the easiest path. Once Ubuntu 24.04 is reachable over SSH, the playbook handles the NVIDIA stack, Docker, the Container Toolkit, nvsm removal, DCGM, and CUDA.
The Ubuntu install itself (step 1 above) and the Secure Boot MOK console enrollment still require a keyboard and screen. Everything else is covered.
Two commands handle the rest.
First-time bootstrap (creates the automation user if it does not exist):
1
2
cd playbooks
ansible-playbook bootstrap.yml -i <ip>, -u <install-user> --ask-pass --ask-become-pass
Full setup:
Warning:
mok_passwordis a one-time throwaway password that you only need long enough to type at the UEFI console after reboot. Quote the-evalue to prevent shell expansion. To keep it out of shell history, prefix the command with a leading space if your shell is configured for it (HISTCONTROL=ignorespacein bash orsetopt HIST_IGNORE_SPACEin zsh), or pass it through a temporary vars file and delete the file afterward.
1
2
cd playbooks
ansible-playbook site.yml -i <ip>, -e target=all -e 'mok_password=<one-time-password>'
After the playbook completes, reboot the machine and watch the console for the MOK enrollment screen. Enter the password you passed as mok_password. This is the one manual step that the playbook cannot handle.
Verification (33 read-only checks across OS, kernel, Secure Boot, driver, CUDA, Docker, and system hygiene):
1
ansible-playbook verify.yml -i <ip>, -e target=all
The roles are modular - you can run just the NVIDIA stack, just Docker, or just the dual-node setup by tag:
1
2
3
4
ansible-playbook site.yml --tags nvidia_stack
ansible-playbook site.yml --tags docker_gpu
ansible-playbook site.yml --tags doca_ofed
ansible-playbook site.yml --tags dual_node
What the Ansible playbook actually does
Before running any playbook with become: true on your hardware, it helps to know what it changes.
The base role:
- Runs
apt dist-upgradeand purgesunattended-upgrades - Disables swap (UMA systems can hit hard lockups with swap + GPU DMA)
- Loads the SBSA watchdog driver via two layers: an initramfs
init-premountscript usinginsmod(bypasses blacklist bundled inside the initramfs), and asbsa-watchdog-load.servicethat runs themodprobebinary directly (bypasses libkmod’s strict blacklist enforcement) - see Step 2 - Sets persistent kernel parameters for PCIe/GPU stability
- Disables Wi-Fi via udev rule
- Runs
fwupdmgrto apply available platform firmware updates
The nvidia_stack role:
- Downloads and installs NVIDIA’s APT repo files from the official NVIDIA CDN
- Installs
nvidia-system-core,nvidia-system-utils,nvidia-system-extra - Installs the
linux-nvidia-hwe-24.04kernel and reboots - Installs the 580-series driver pinning package, open kernel modules, and DCGM
- Reboots again to load NVIDIA modules
- Installs
cuda-toolkit-13-0and configures/etc/profile.d/cuda.sh - Purges
nvsmand its orphaned dependencies
The docker_gpu role:
- Installs Docker CE if not already present (from the NVIDIA repos)
- Installs
nvidia-container-toolkitandnv-docker-options - Configures the NVIDIA container runtime as Docker’s default
- Optionally queues MOK key enrollment if
mok_passwordis provided
The doca_ofed role:
- Checks for a ConnectX-7 NIC via
lspciand skips the whole role on hosts without one - Installs
doca-bos8-latest-repoandnvidia-repo-keys, thenapt full-upgrade - Installs
nvidia-system-mlnx-drivers - Reboots if the packages changed, to load the new
mlx5_coreDKMS driver and apply any pending NIC firmware update - Asserts
mlx5_coreis loaded afterward
The dual_node role:
- Deploys the
40-cx7.yamlnetplan config for both CX-7 interfaces - Generates SSH keys and exchanges them between nodes for passwordless access over the inter-connect
- Installs NCCL development packages and Open MPI
- Builds
nccl-testsfor validation
All tasks are idempotent - running the playbook twice produces the same result.
Post-install verification
After setup (manual or Ansible), verify the key components:
1
2
3
4
5
6
7
8
9
10
11
12
# GPU and driver
nvidia-smi
# CUDA compiler
nvcc --version
# Persistence mode on
nvidia-smi --query-gpu=name,persistence_mode --format=csv,noheader
# DCGM health check
dcgmi health -g 0 -c
# GPU access from inside a container
docker run --gpus=all --rm ubuntu:24.04 bash -c "ls /dev/nvidia*"
# Memory available (use /proc/meminfo on UMA platforms)
grep -E 'MemTotal|MemAvailable' /proc/meminfo
The one gotcha: the Realtek 10GbE chip
The GX10 has two network controllers: the ConnectX-7 high-speed NIC and a separate Realtek RTL8127 10GbE RJ45 port. After wiping DGX OS and installing Ubuntu, the Realtek chip can disappear from the PCIe bus entirely.
It looks like a hardware failure at first, but in my testing it came down to two things:
BIOS Fast Boot skips executing PCIe NIC Option ROMs at POST. The Realtek chip never fully initializes. Fix: disable Fast Boot in BIOS (Boot tab).
The Ubuntu installer deletes all non-Ubuntu UEFI boot entries, including the Realtek PXE entry the BIOS uses as a signal to initialize the chip. Without that entry, the chip’s PCIe Data Link Layer stays inactive even with Fast Boot disabled.
After disabling Fast Boot, you need a genuine cold boot (power off, remove AC, wait 30 seconds, restore AC). A warm reboot is not sufficient - the PCIe capacitors need to discharge.
After the cold boot, 0007:01:00.0 will appear in lspci and the r8127 driver will bind automatically. The full diagnosis and fix is in docs/04-doca-ofed.md.
Where to Buy
(Affiliate links. I may receive a small commission at no cost to you.)
Links
- Repository: github.com/timothystewart6/ubuntu-gb10
- DGX OS 7 User Guide (NVIDIA’s reference): docs.nvidia.com/dgx/dgx-os-7-user-guide
- My GX10 cluster writeup: technotim.com/posts/local-ai-gx10
- My vLLM image for GB10: technotim.com/posts/vllm-gb10-docker
- vLLM image repository: github.com/timothystewart6/vllm-gb10
🤝 Support the channel and help keep this site ad-free
⚙️ See all the hardware I recommend at https://l.technotim.com/gear