The Mini Rack Accessories You Didn’t Know You Needed

The easy part of building a mini rack is deciding what goes inside it. You probably already know which switch, mini PC, or storage device you want.
Everything after this is the hard part.
How do you power everything without filling the rack with adapters? Where does the UPS go? How do you handle cooling, cables, patching, remote access, and a local display without using up every rack unit?
That’s what I wanted to figure out.
I looked for accessories made specifically for 10-inch racks, then filled in the gaps with normal rack hardware where it made sense.
You can 3D print your way out of almost any mini-rack problem, and for device-specific mounts, that may still be the best option. But not everyone has a printer, and sometimes you just want to buy a metal part, bolt it in, and move on.
For this build, I collected shelves, fans, patch panels, lighting, displays, power accessories, a compact UPS, and a four-port network KVM. Then I installed everything in a 12U DeskPi RackMate T2 to see what was actually useful.
Some of these products were sent to me after I contacted the companies for testing. This post is not sponsored, and none of the companies had any input on what I said. I purchased quite a few of the products myself too.
The DeskPi RackMate T2 12U
Most of my previous mini rack builds have been smaller. I started by packing an entire homelab into a RackMate T1, then built two smaller UniFi-focused network racks. This was my first time using the larger 12U model.
The extra room is nice, but the rack still feels familiar. The metal frame is solid, the finish is matte, and the acrylic side panels look great.
Acrylic also scratches if you look at it wrong, so I left the protective film on until I was almost finished.
The top panel is acrylic too, with plenty of ventilation. Removing the film from that panel might be the least satisfying peel of all time.
The bottom is sheet metal, and there are two handles on top. Those handles become surprisingly useful once the rack is loaded and starts getting top-heavy.
DeskPi also includes shelves, vented panels, solid blanking panels, and a half-U patch panel.
I like the rack, but I ran out of screws.
That sounds minor, but people buying a rack like this probably care about how the finished build looks. Mixing screw lengths, styles, and finishes across the front makes it look unfinished.
For a premium rack, there should be enough matching hardware to use every rack unit.
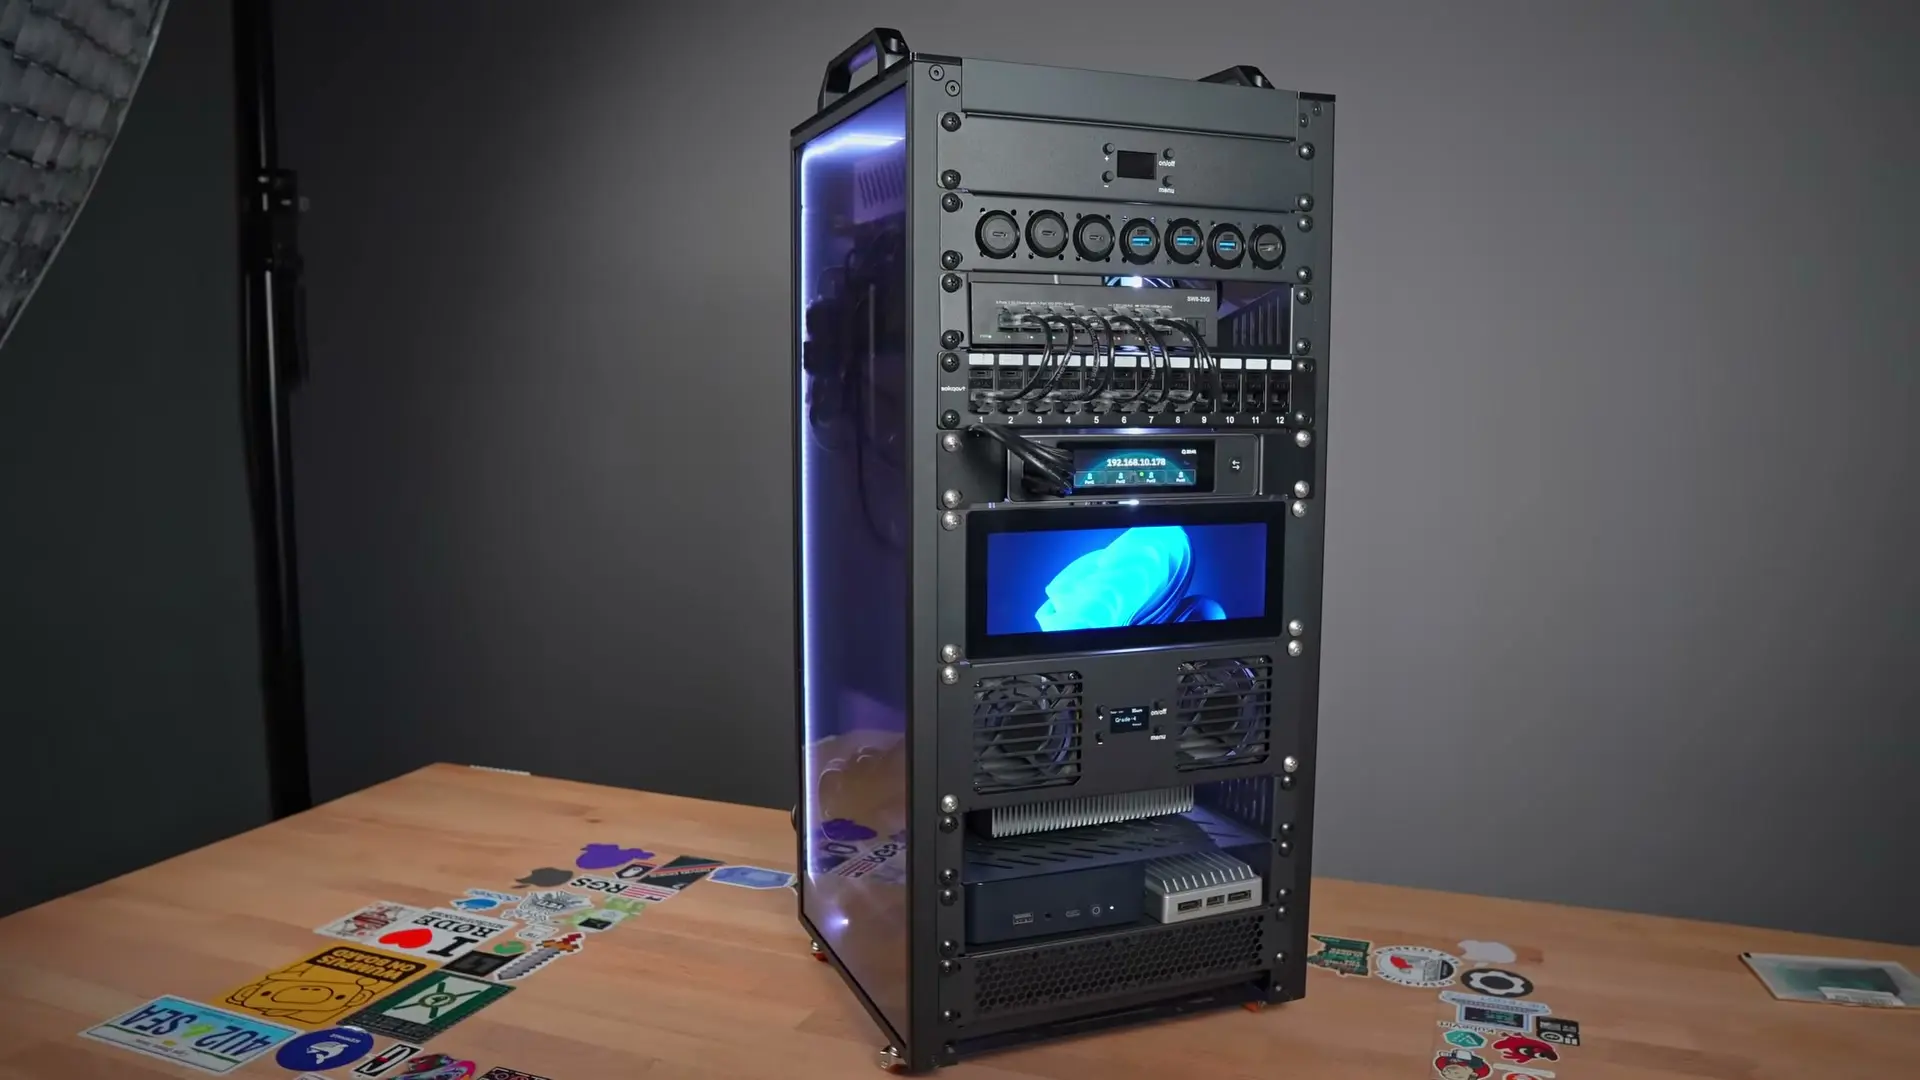
Everything installed in the RackMate T2.
Mini rack mounting hardware is different
The RackMate doesn’t use the same hardware as a typical full-size square-hole rack.
Most larger racks use M5 or M6 screws with cage nuts. The RackMate uses pre-threaded #10-32 holes, so the stainless M6 hardware from my 19-inch rack doesn’t fit.
Rackstuds don’t work either. They replace cage nuts in square-hole rails, and there aren’t any square holes here.
I have now made this exact mistake on multiple mini rack builds. I’ll plan around Rackstuds, get the rack in front of me, and remember that the rails are threaded.
It’s obvious when you’re looking at the rack. It’s easier to forget when most of your other rack hardware uses cage nuts.
I would still love to see a four-post mini rack with square-hole rails. Then I could reuse the same cage nuts, screws, and Rackstuds I already have.
Plenty of normal rack accessories do carry over. D-rings, Velcro, shelves, short patch cables, and right-angle adapters all work fine at this size.
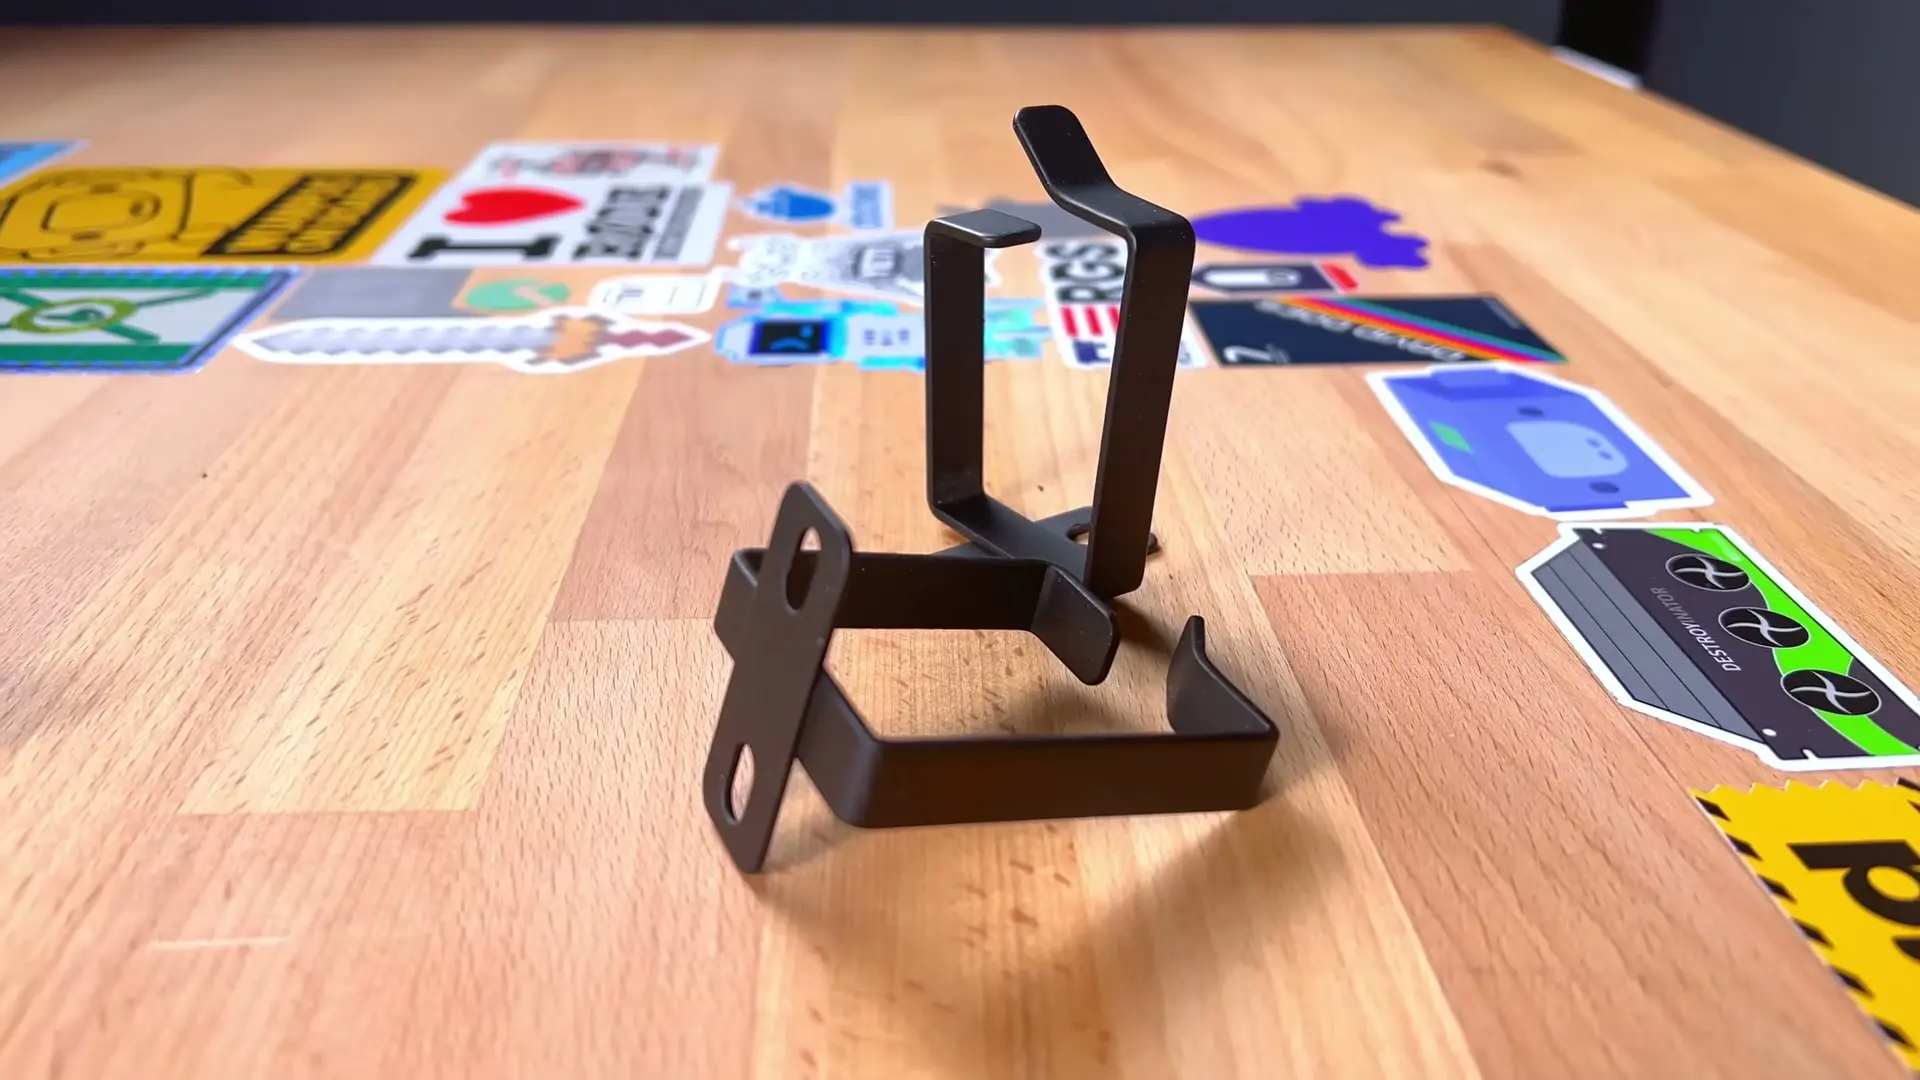
Standard D-rings work just fine in a 10-inch rack.
Tiny casters that are more useful than they look
One of the first things I changed was the feet.
The mounting holes in the bottom of the RackMate are M4, which led me to some of the smallest casters I’ve ever seen.
They are tiny. They are also kind of cute.
They thread directly into the bottom of the rack, and the orange wheels look good against the black frame. More importantly, they let me rotate the rack while I’m working on it.
I originally thought the casters would mostly be a visual gag for the video. After a few hours of building, I was glad I had them.
Instead of moving myself around the rack, I could spin the rack and bring the side I needed toward me.
The downside is that a rack with wheels can roll away.
I picked up oversized rubber furniture cups and parked the casters inside them. They look ridiculous next to the tiny wheels, but they work like parking brakes.
I planned to remove the casters after filming. I’m keeping them, and I’ll probably use them again.
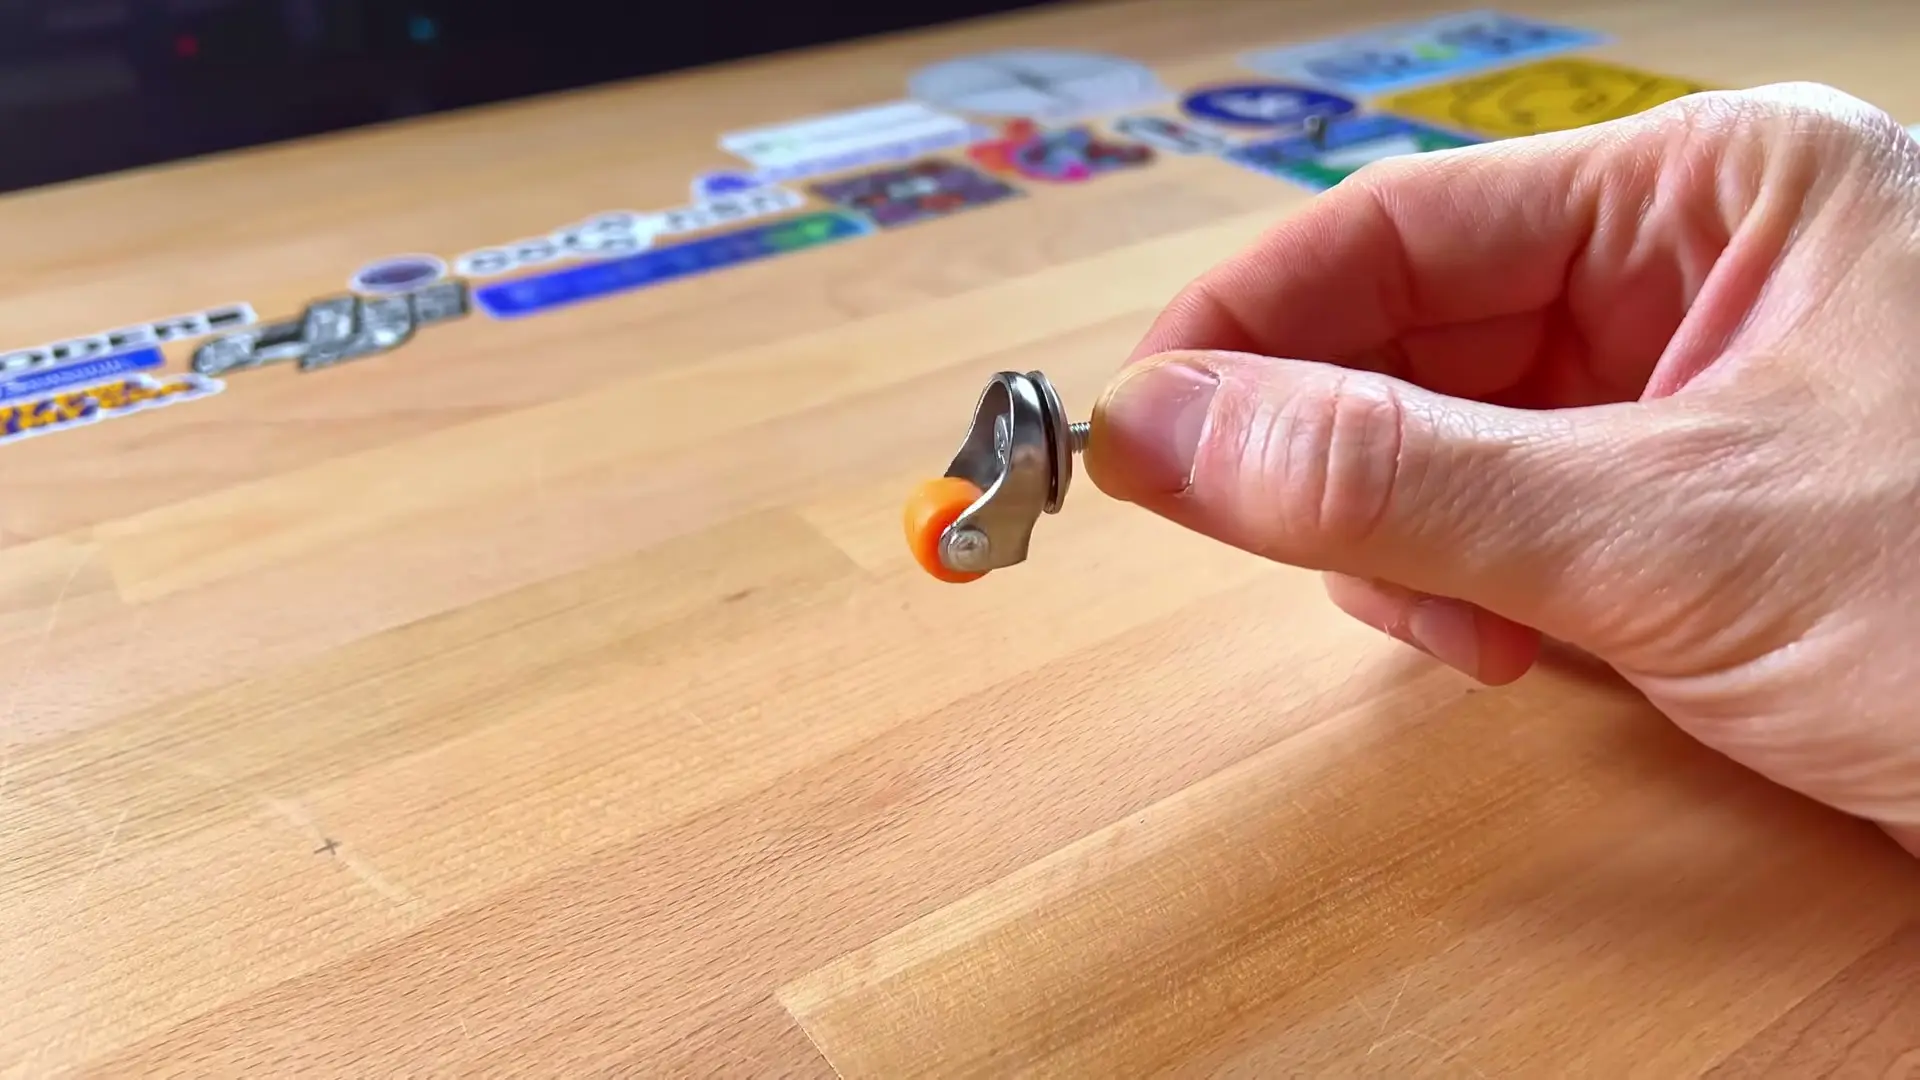
Possibly the world’s smallest rack caster.
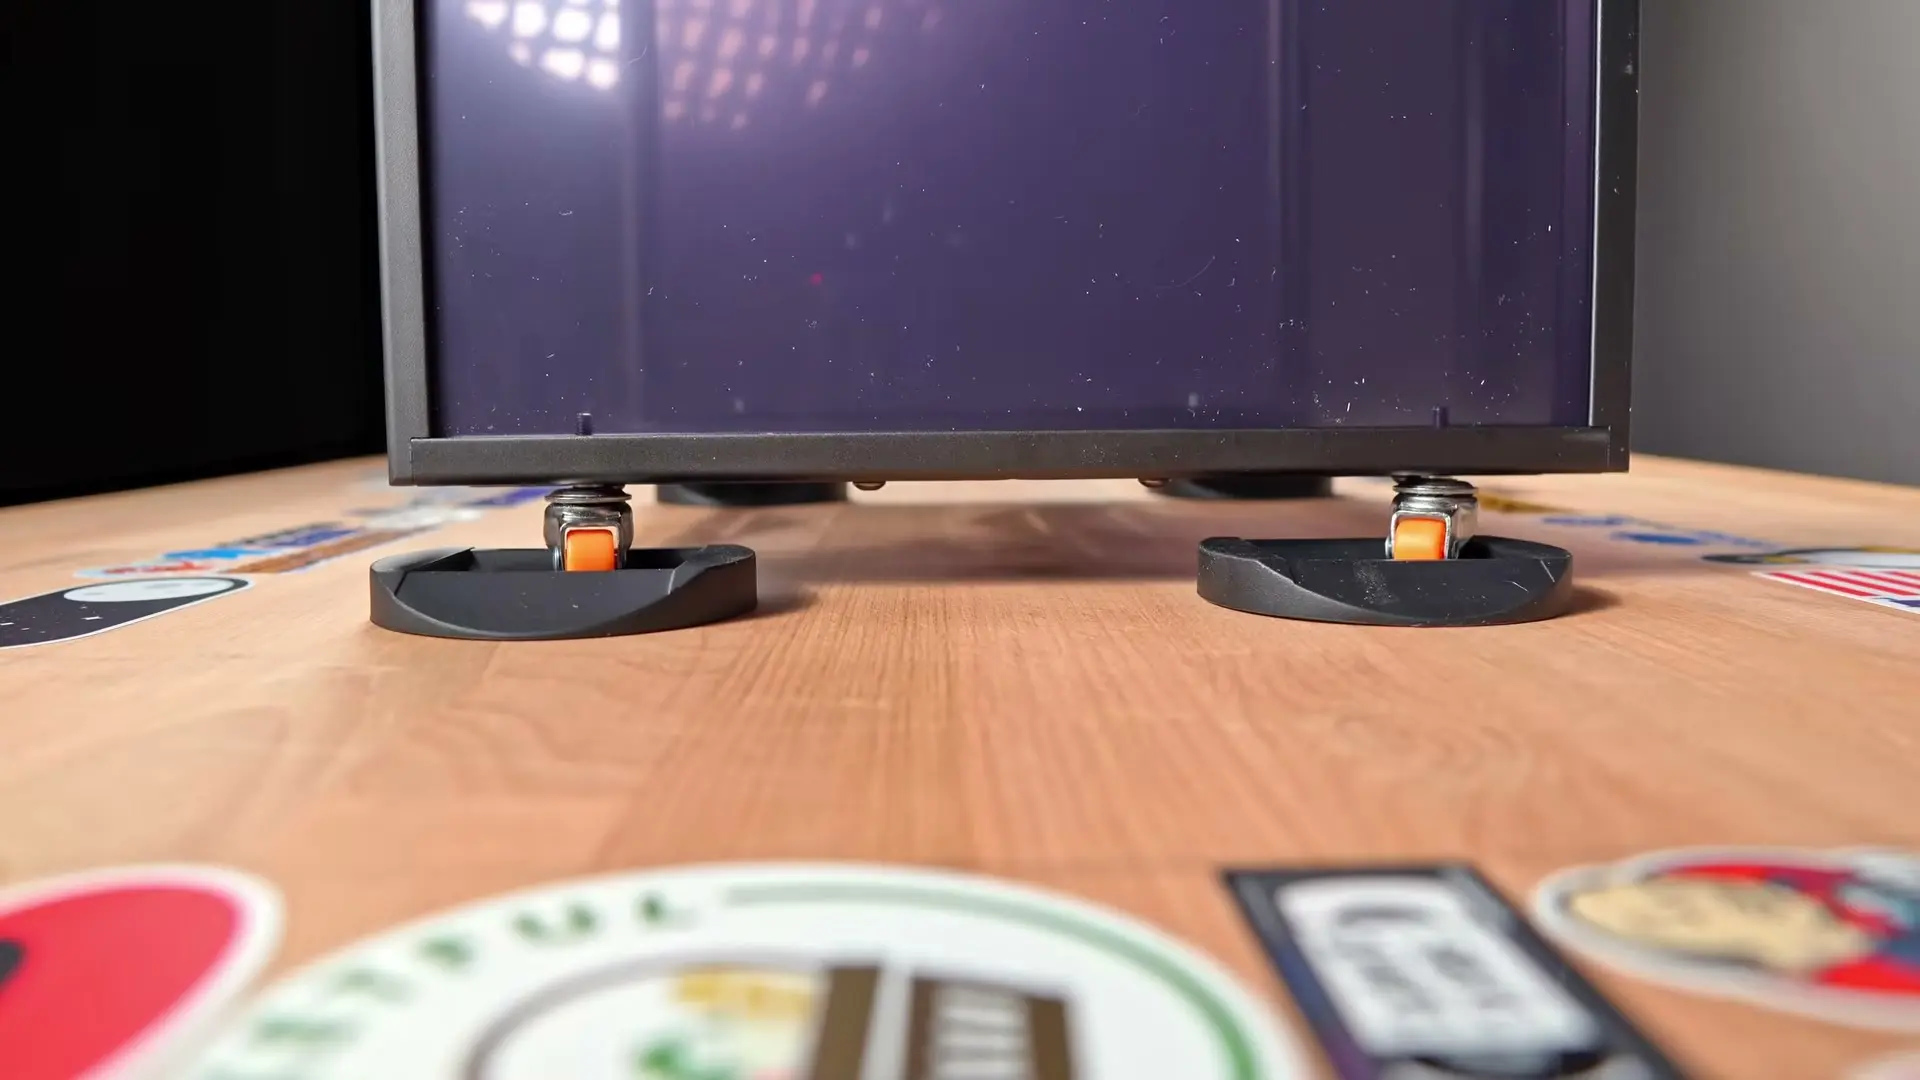
Ridiculous looking, but effective parking brakes.
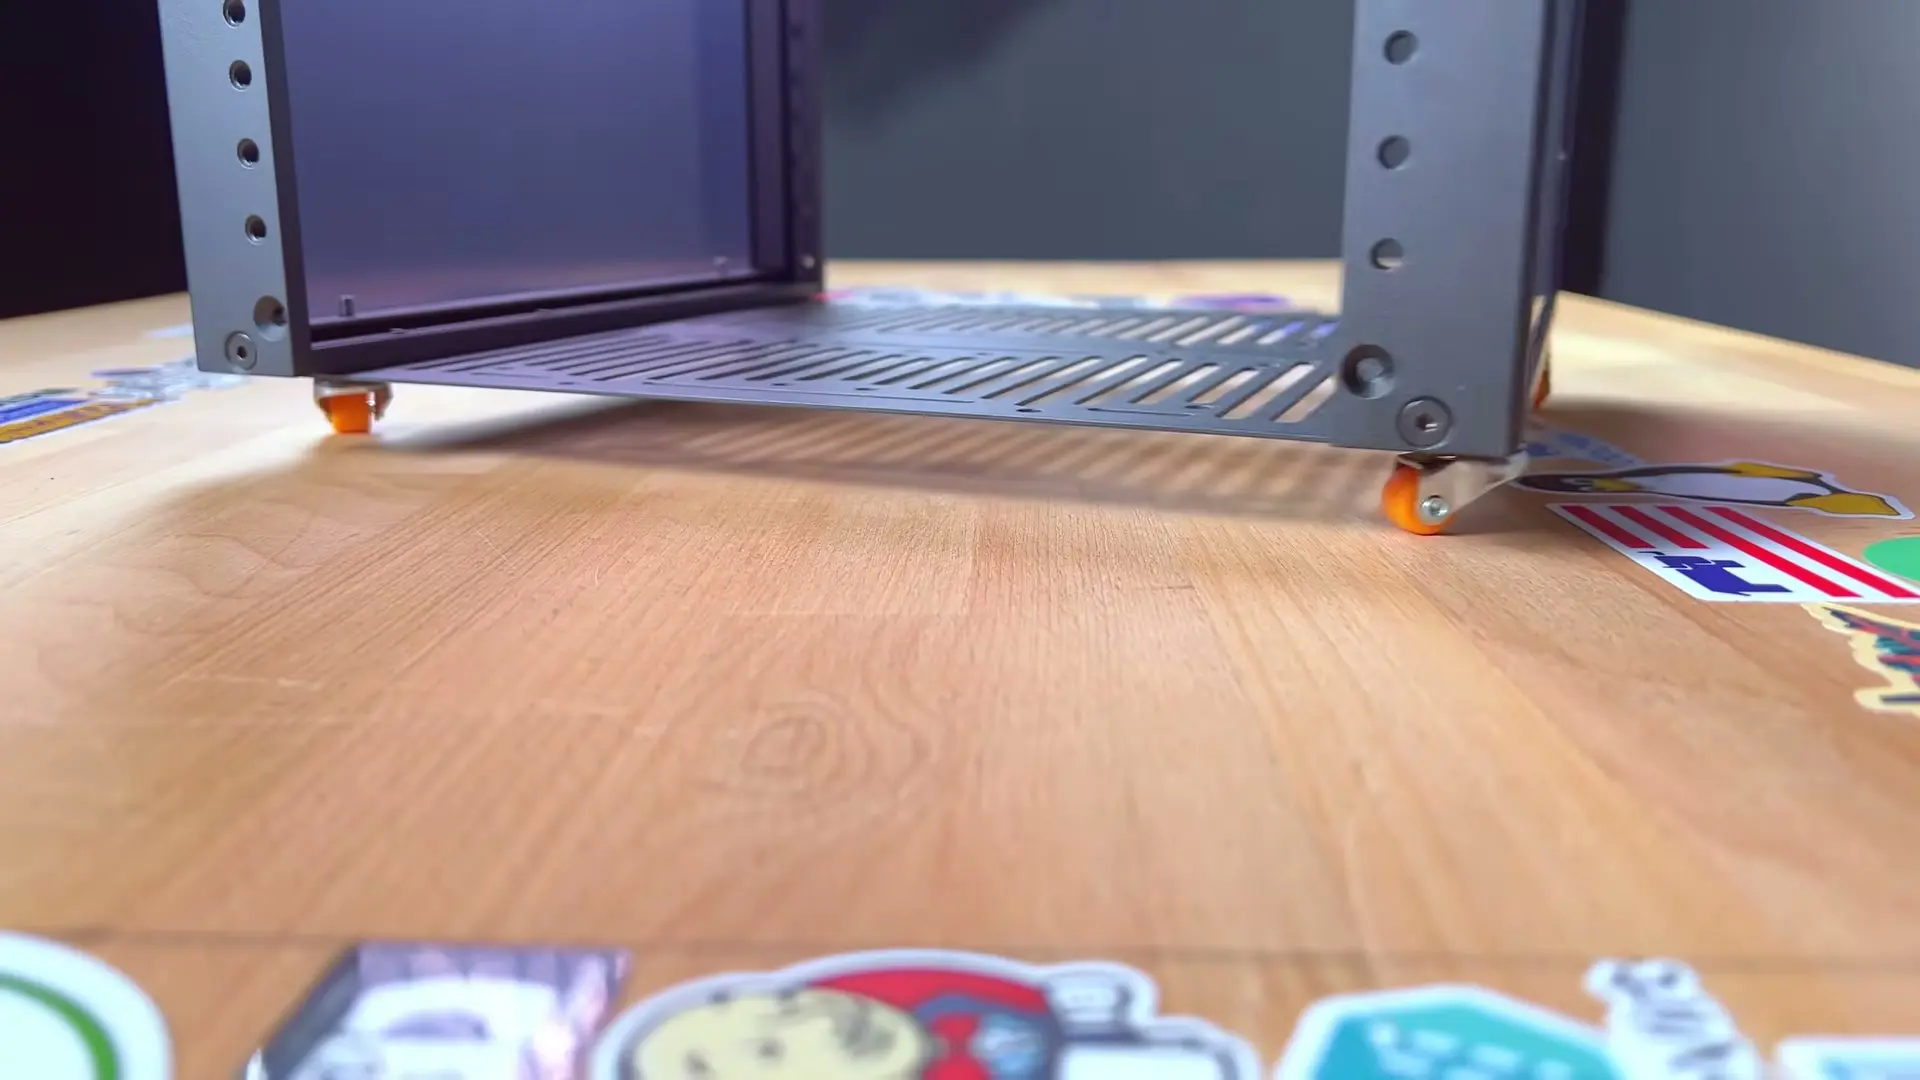
The casters make it much easier to turn the loaded rack while working on it.
A UPS that almost fits
Finding a UPS for a 10-inch rack is harder than it should be.
The Tripp Lite 600VA UPS from Eaton was the closest match I found. It’s compact and lightweight, but it doesn’t slide through the front like a native rackmount device.
It fits inside the RackMate, but you have to angle it into place and basically build the rack around it.
Once something is mounted directly above it, the UPS isn’t coming back out without taking part of the rack apart.
It’s also slightly taller than 1U. Mounting it at the very bottom gives it just enough extra room that it doesn’t interfere with the rack unit above.
Once installed, it does the important part well. It has four outlets with surge protection and battery backup. At around a 50-watt load, it estimated roughly 45 minutes of runtime.
The version Eaton sent me also includes remote management, but it’s cloud-only. There is no local web interface, and you can’t manage it directly over your own network.
You add it to Eaton’s platform using NFC or a barcode, then navigate through the groups in the app to find it again.
I also expected individual outlet control. Instead, all four outlets are switched together.
I discovered that after turning off all four outlets, including the network switch providing the UPS with internet access. The UPS immediately went offline, and I couldn’t turn anything back on remotely.
That was mostly a Tim problem, but it also shows the downside of all-or-nothing outlet control.
The USB-C port looked like it might expose local status data to something like NUT. It doesn’t. It’s a management port, and I couldn’t read the UPS from a local server.
For a retail kiosk, point-of-sale system, or a fleet of remotely managed UPS devices, the cloud-first setup may make sense.
For a homelab, I’d rather have local management with optional cloud access.
Eaton also sells a version without the cloud features if remote management doesn’t matter to you.
Physically, this UPS is already close to what I want. Make it slightly thinner, add rack ears, and it could become a proper 10-inch UPS.
For now, I’m just glad it fits.
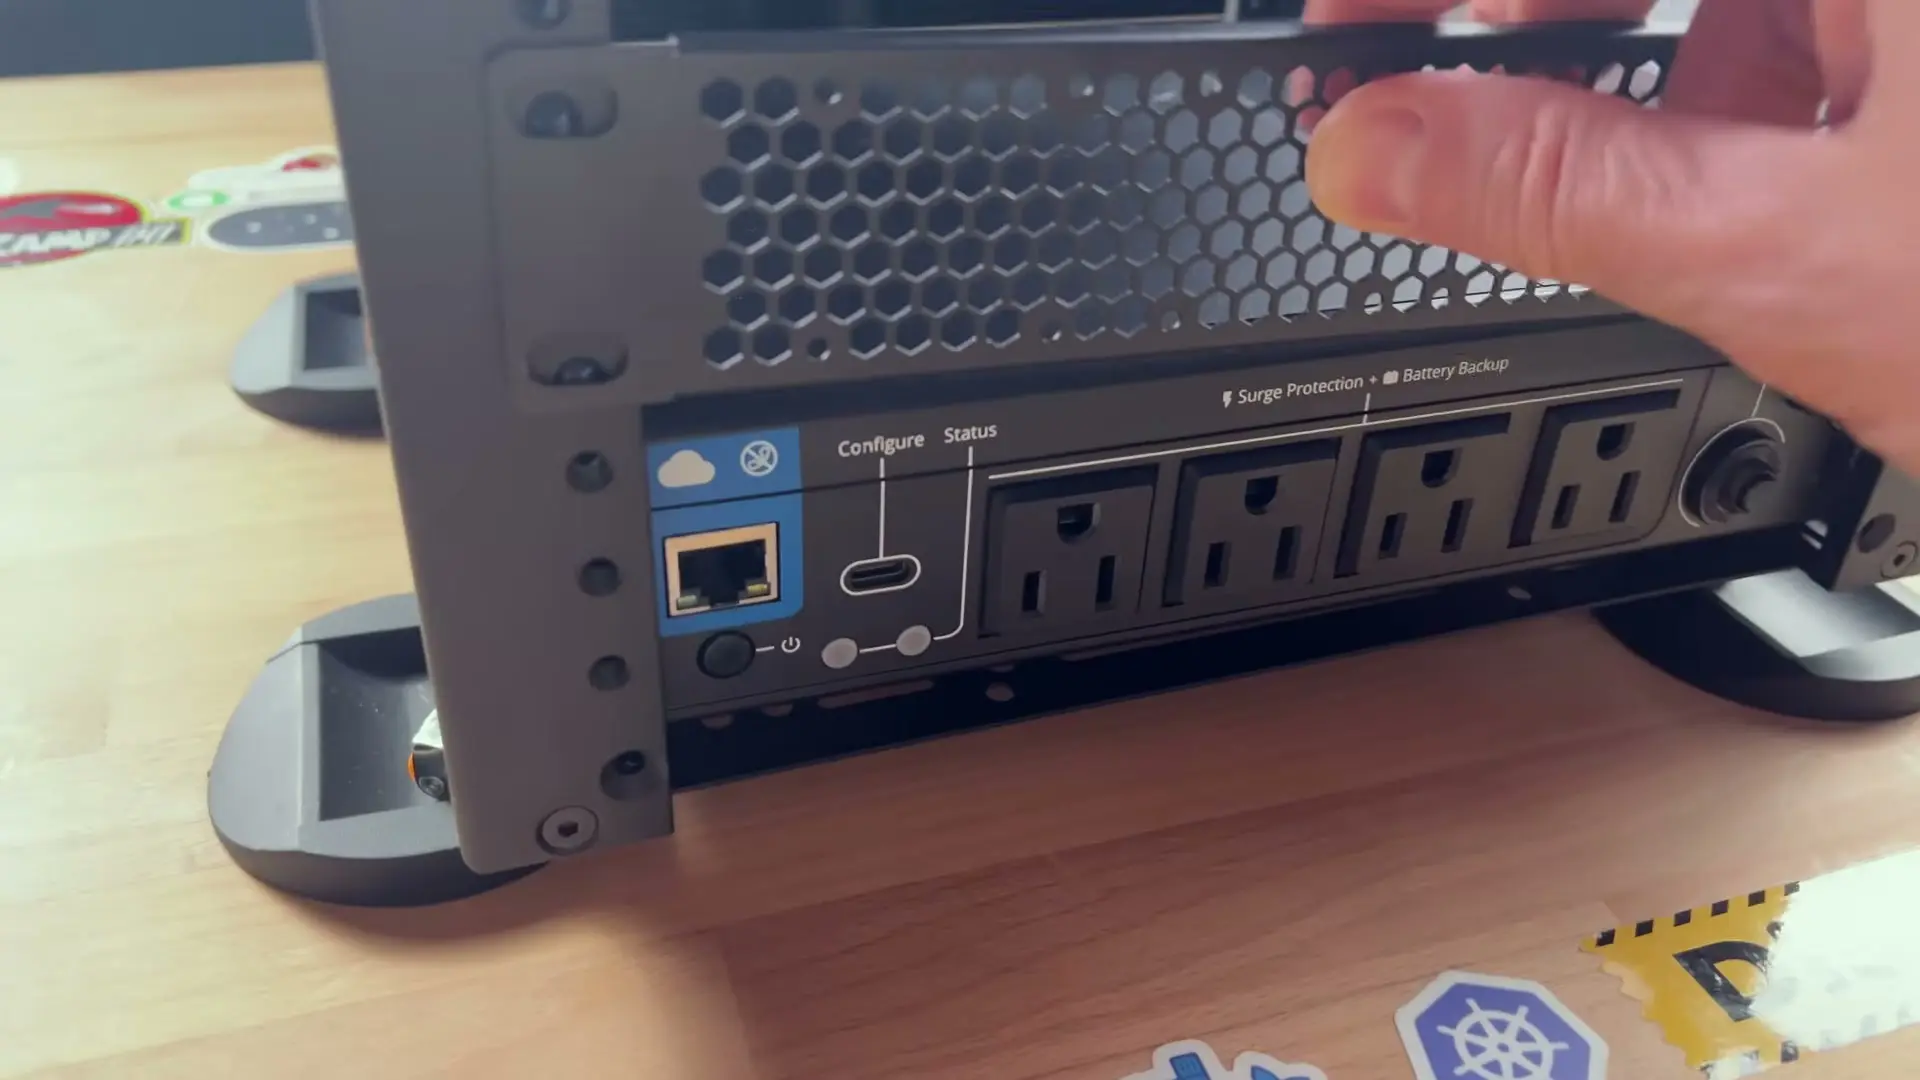
Four battery-backed outlets, Ethernet, and USB-C management.
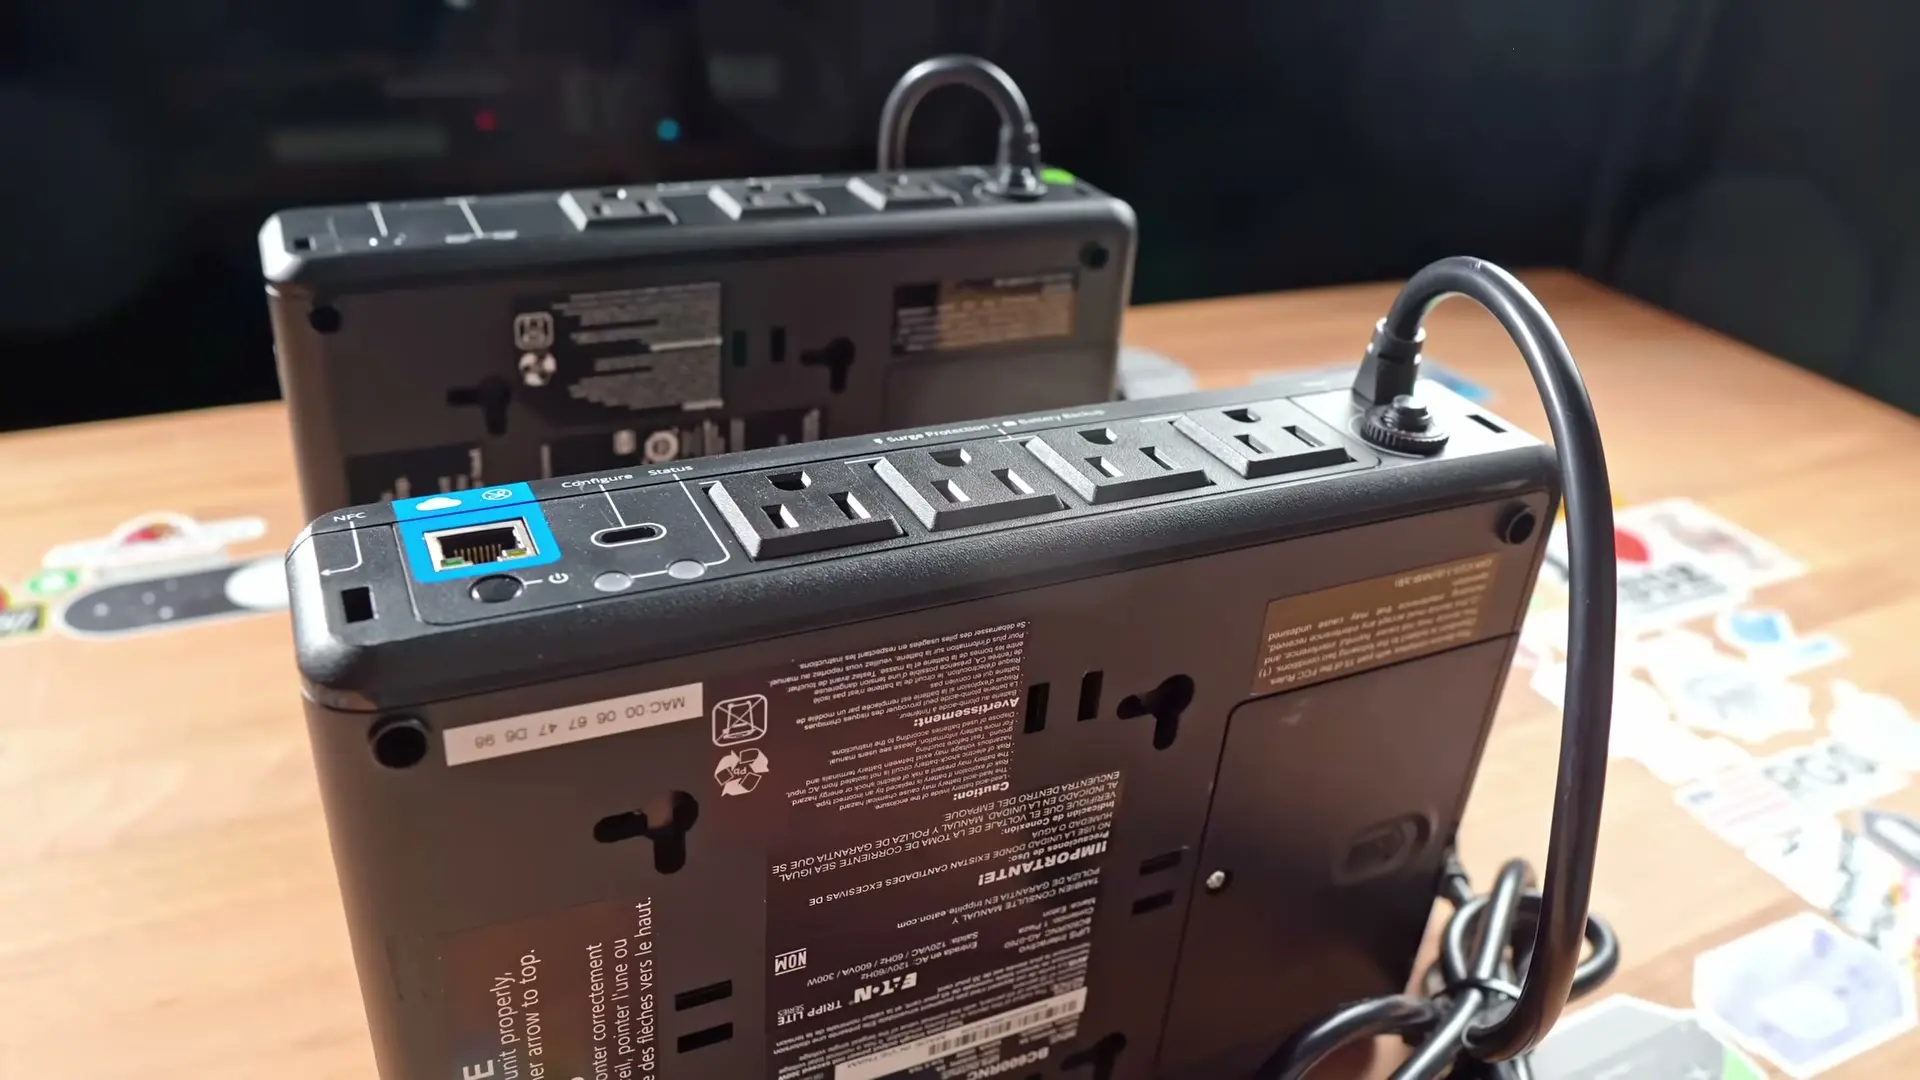
The cloud and non-cloud models use the same compact form factor.
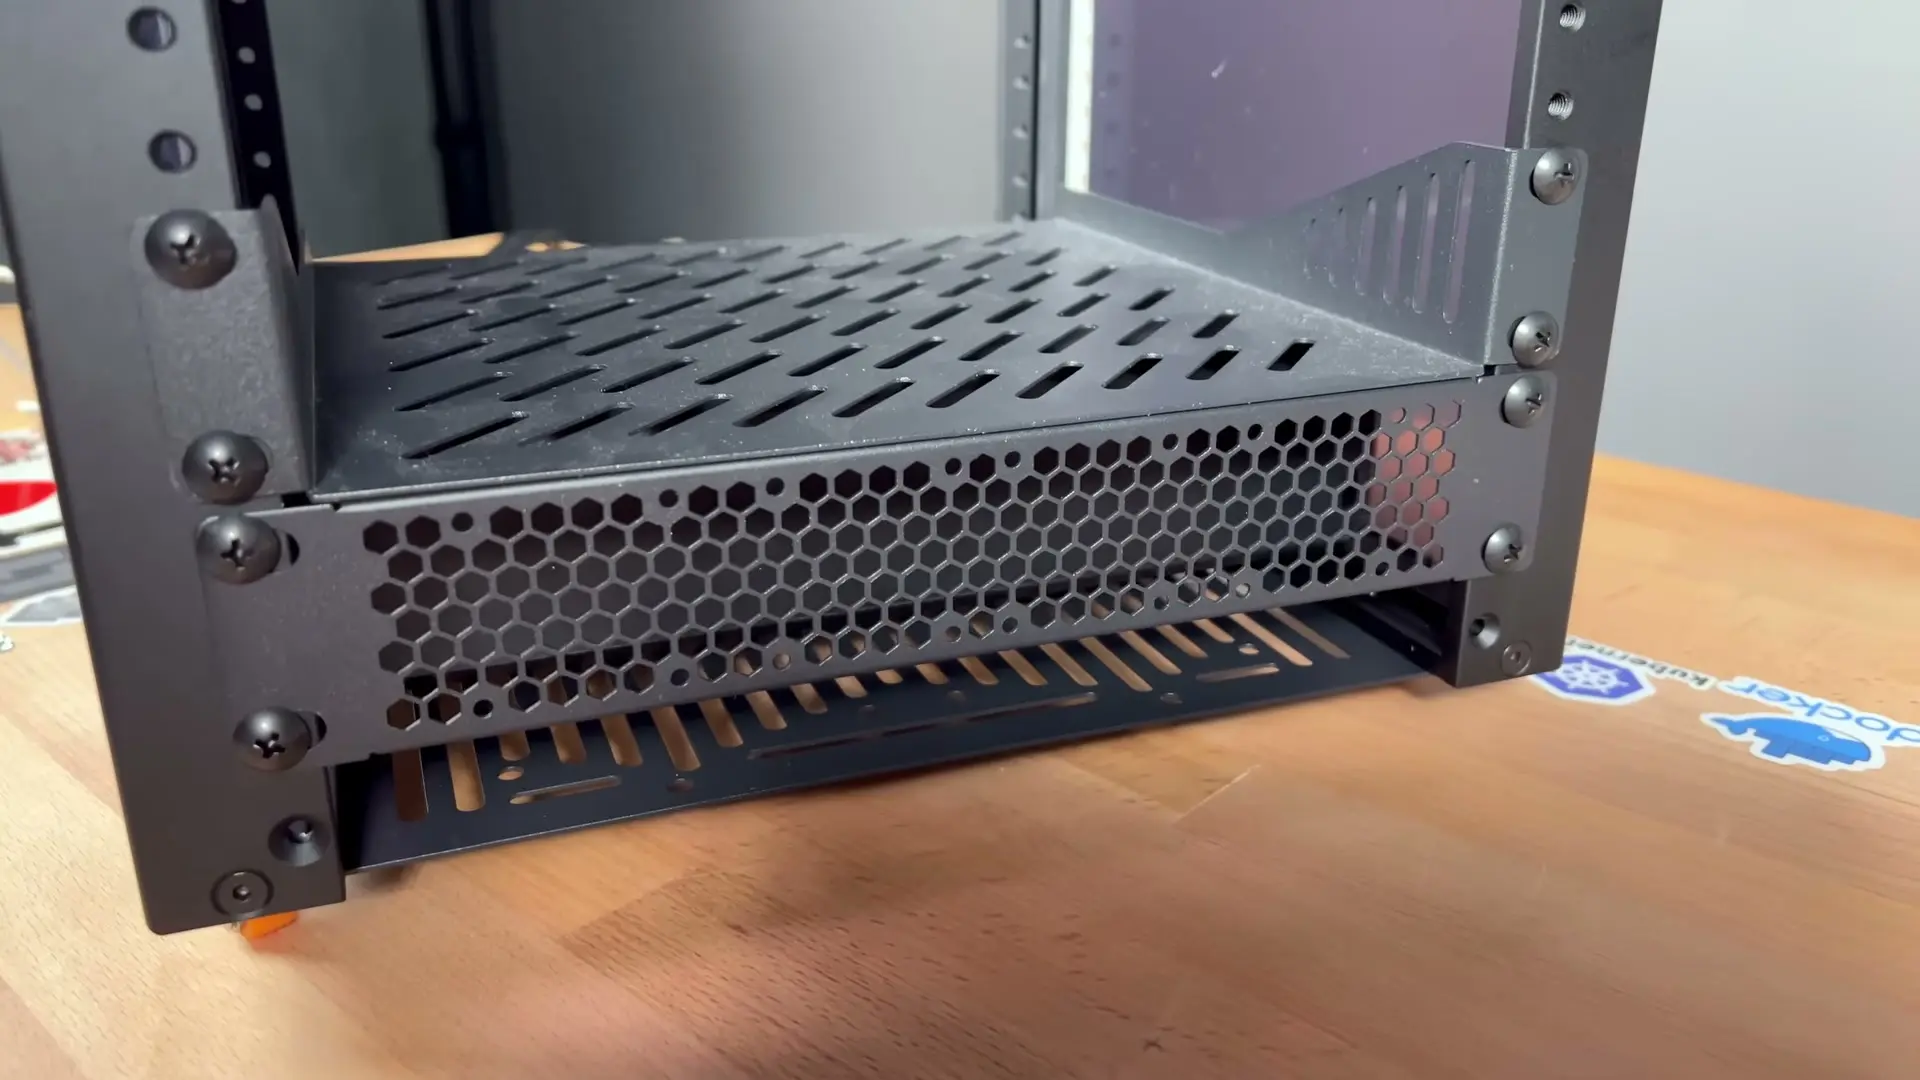
The vented panel hides the UPS and keeps it from sliding forward.
Lighting
I add lighting to almost every rack I build.
Some people hate RGB in racks. I don’t. It’s fun, and it makes it much easier to work around a frame full of black hardware and black cables.
For this build, I used a USB-C-powered RGB COB strip. COB lighting looks smoother than a traditional LED strip because you don’t see every individual LED.
The 6.5-foot strip was long enough for the 12U RackMate. I cut it at one of the marked copper points, which always makes me slightly nervous the first time.
It worked fine.
I wish the strip came with a cap for the cut end. It probably wasn’t going to short against the frame, but I wrapped it with electrical tape anyway.
The adhesive has held surprisingly well. It stayed exactly where I installed it for weeks.
There are plenty of effects, including chasing, flashing, pulsing, and gradients. You can also change the speed.
Most of the time, I just want enough light to see what I’m plugging in.
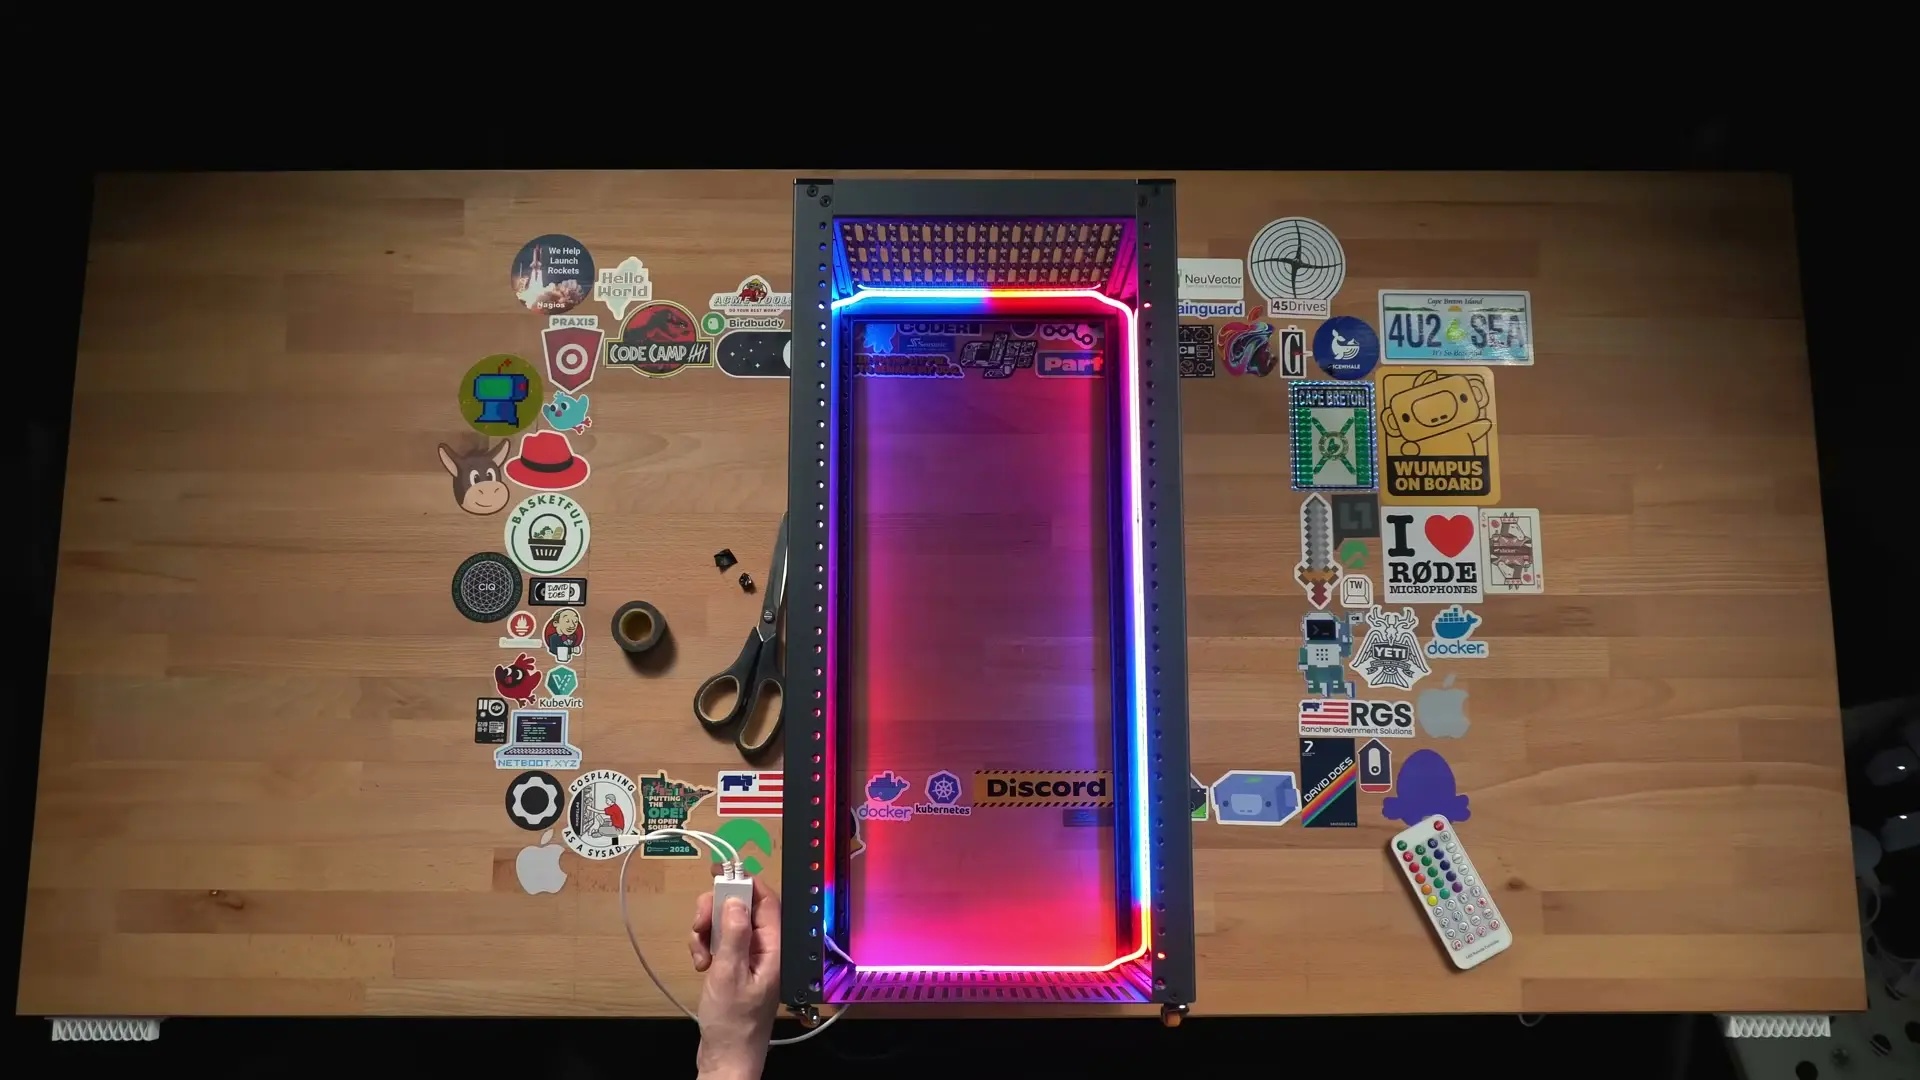
Useful work light with the option to make the rack look ridiculous.
Shelves and blank panels
Shelves are still the easiest way to mount hardware that was never designed for a rack.
The RackMate shelves take up normal rack units and work well for mini PCs, switches, power adapters, and all the other oddly shaped hardware without rack ears.
Native 10-inch hardware is becoming easier to find, but shelves are still doing most of the work.
Blanking panels are mostly cosmetic for me because I tend to fill every available rack unit. They can also hold a space for hardware you plan to add later.
The vented panel at the bottom ended up being genuinely useful.
I mounted it in front of the UPS. It hides the unfinished-looking front, leaves room for airflow, and keeps the UPS from sliding forward when the rack moves.
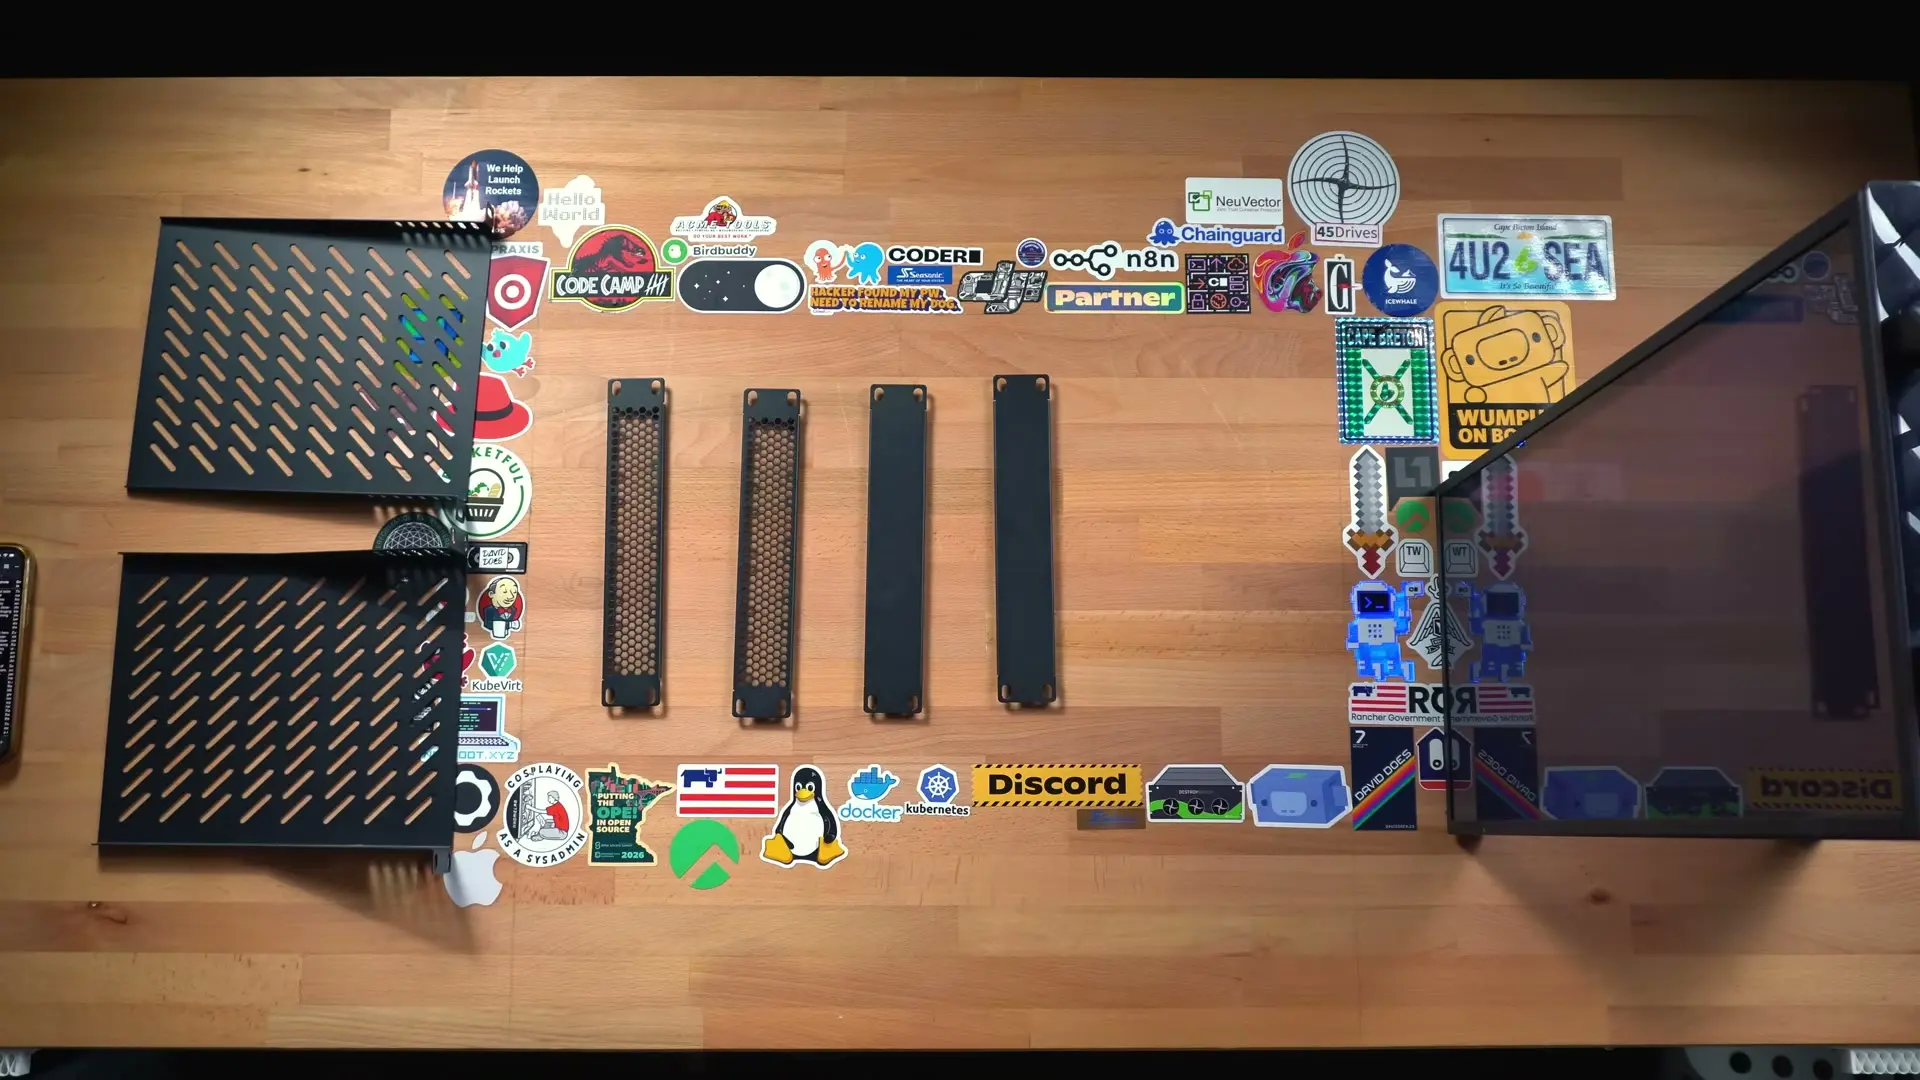
Shelves are still the universal adapter for weird mini-rack hardware.
Cooling panels
A small rack isn’t automatically a cool rack.
Mini PCs, hard drives, GPUs, AI systems, and networking gear can all end up packed within a few inches of each other. Depending on the hardware, you may need active airflow.
I tested two fan panels from DeskPi.
The first is a 1U panel with four small fans. It pulls warm air from below and exhausts it through the top. Mounting it near the top of the rack makes the most sense, although it could also sit directly above or below a hot device.
The second is a 2U panel with two fans that move air horizontally through the rack.
Both have temperature probes, programmable controls, and 12-volt DC inputs.
I used caution tape to make the airflow visible, mostly because it gave me an excuse to literally throw caution into the wind.
The fans don’t move a huge amount of air. They can help when they’re close to a warm device, but I wouldn’t expect either panel to cool the entire open rack.
The controls also took some time to figure out. The display uses terms like fan grade, warn temperature, and close temperature.
I assumed open was the temperature where the fans turn on and close was where they turn off. Getting the behavior I wanted still wasn’t obvious.
The 2U panel also seemed to move air in the wrong direction for front mounting. It made more sense to me in the rear as an exhaust.
Neither panel included a power adapter, which surprised me. DeskPi sells a DC distribution unit that can power several accessories, so that may be the intended setup.
I still would have liked an adapter in the box.
The panels are well made and fit the rack cleanly. I just wish they moved more air and were easier to configure.
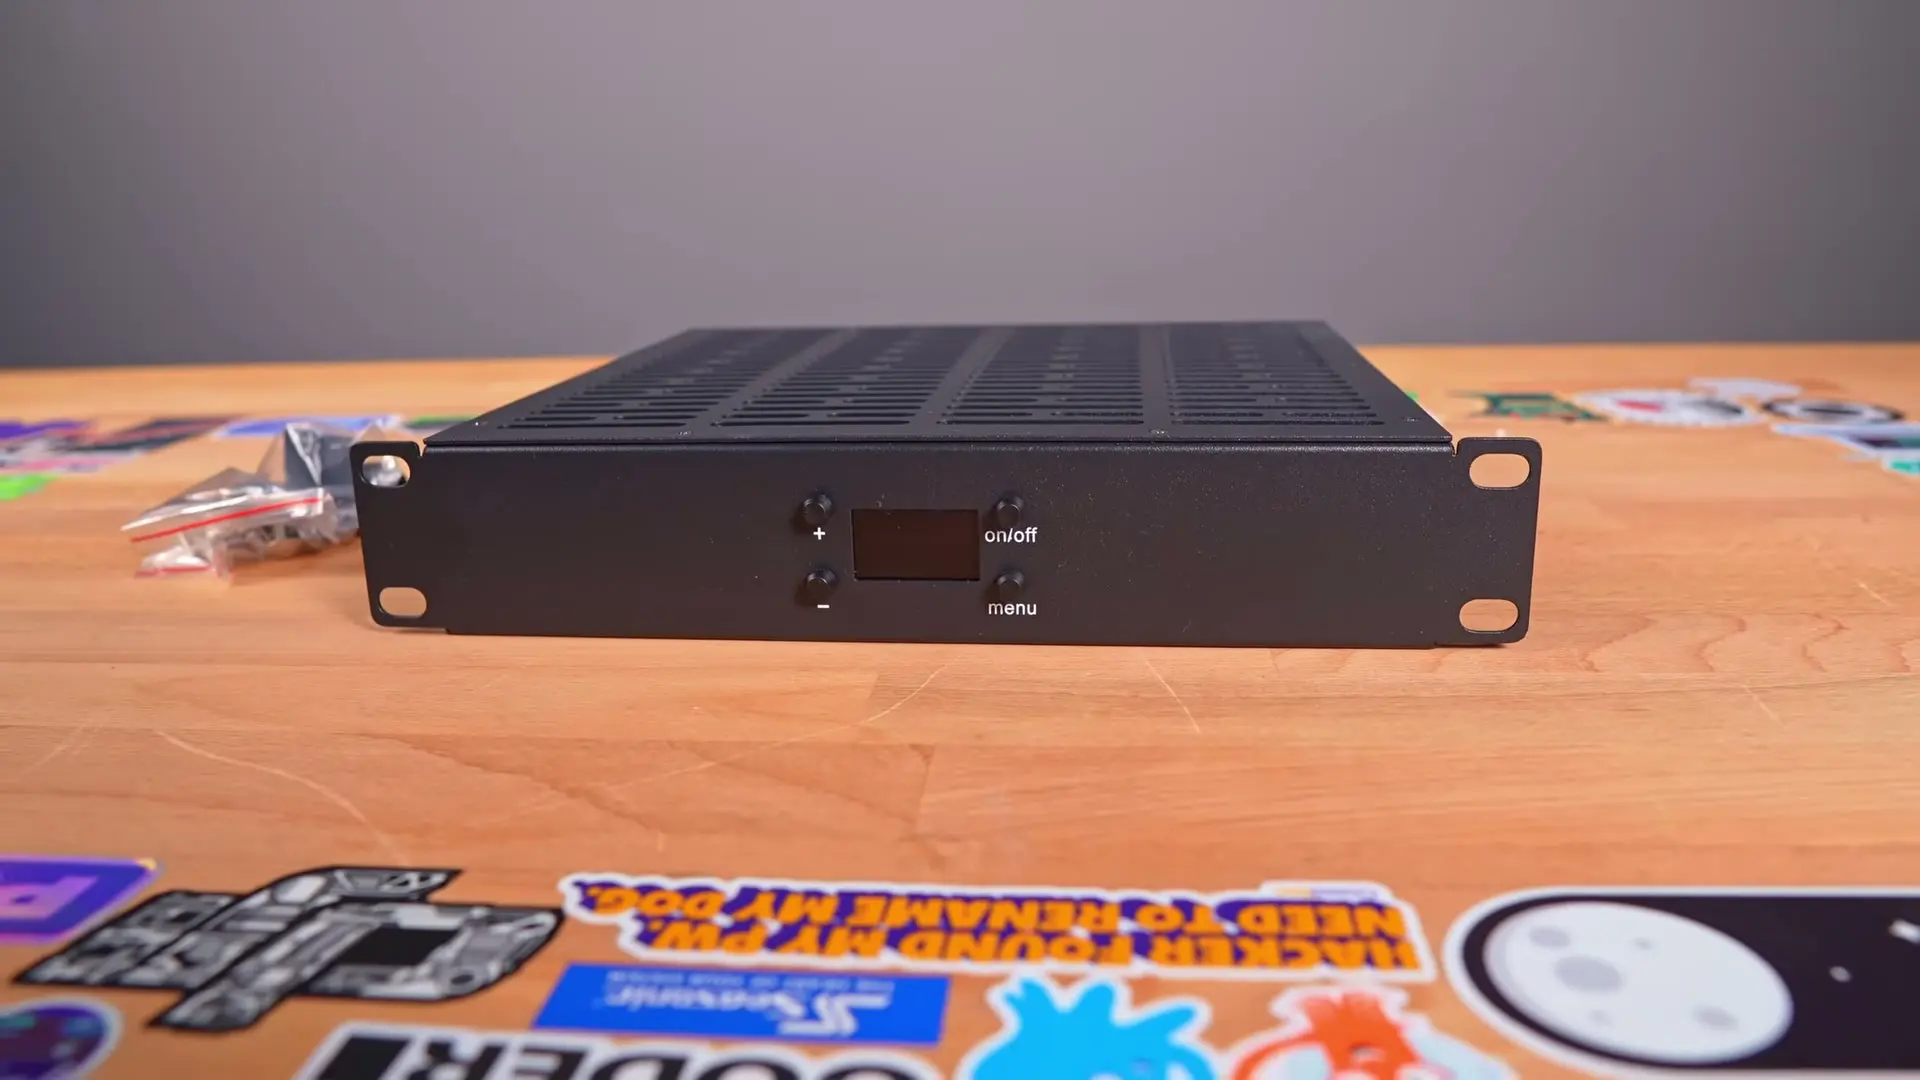
The 1U panel pulls air from below and exhausts it through the top.
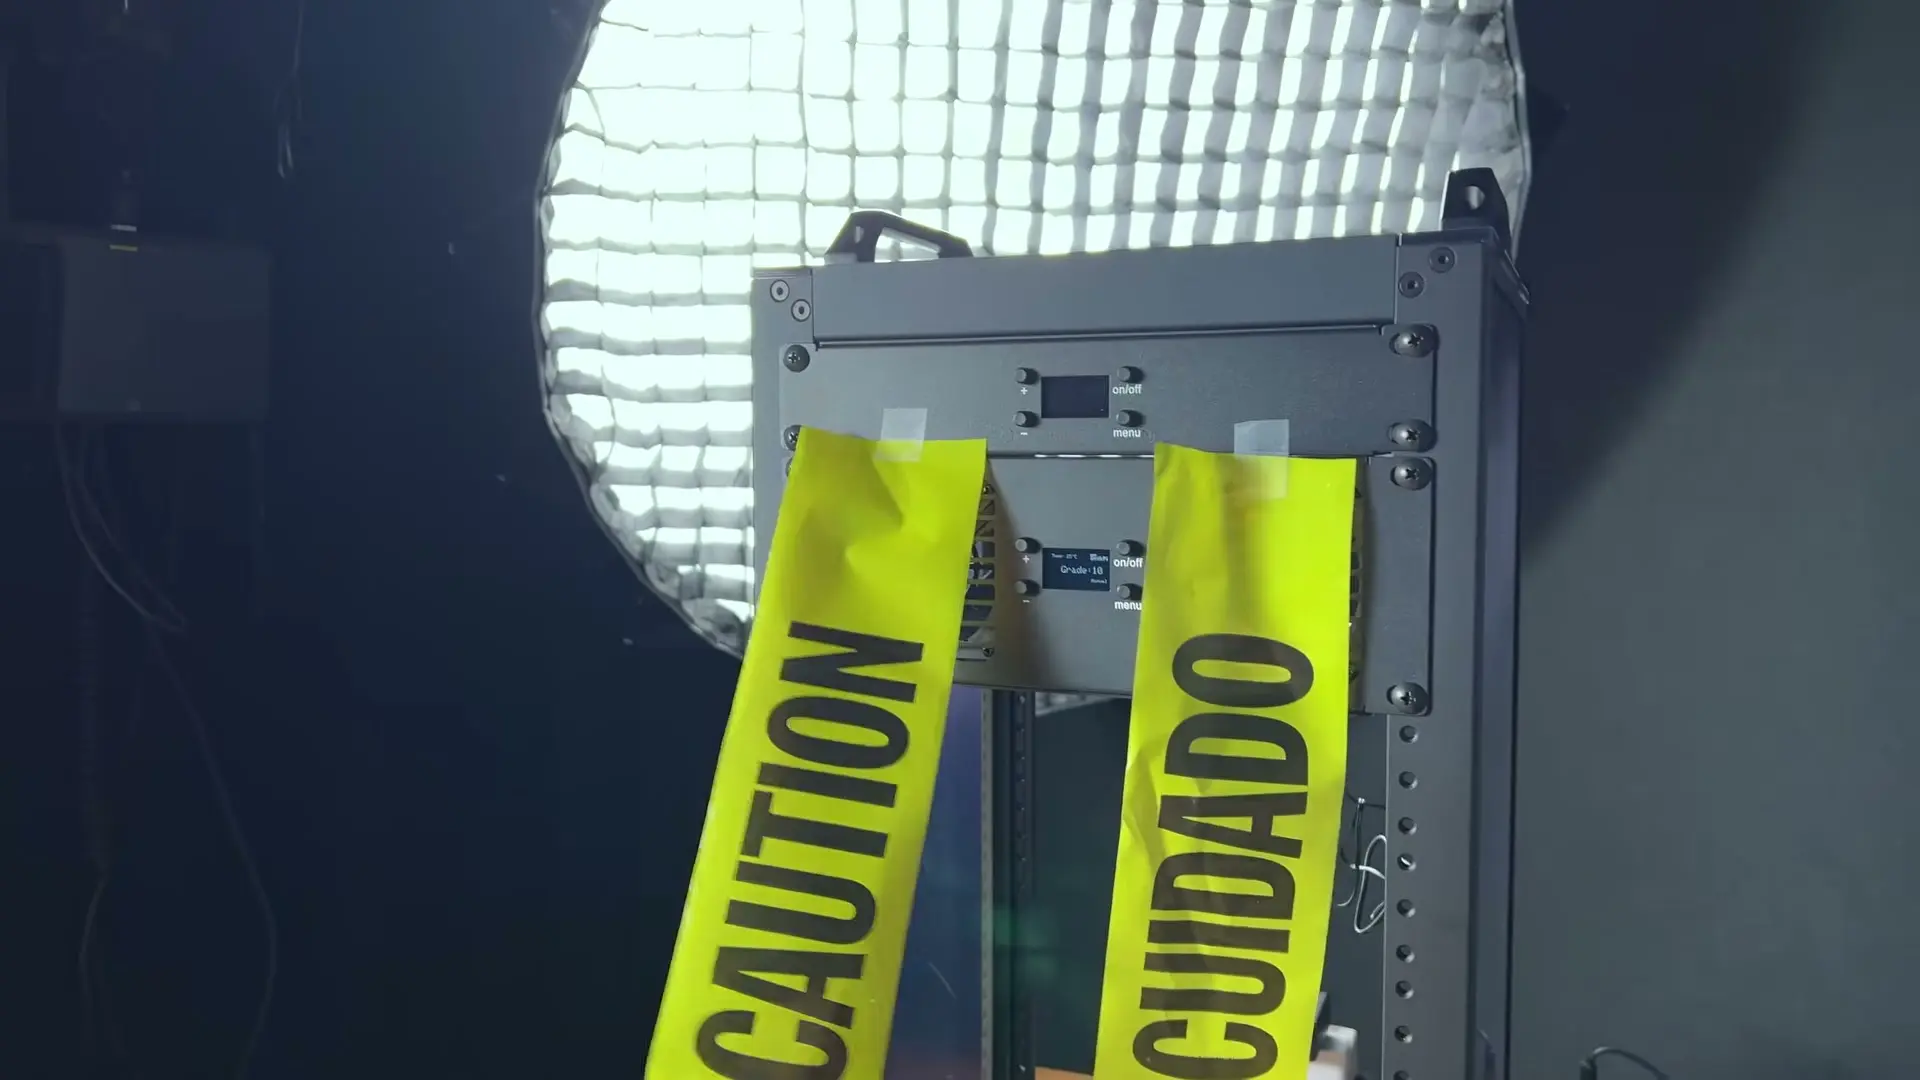
The caution tape shows the airflow. I expected a little more air though there’s only so much you can get from this size fan
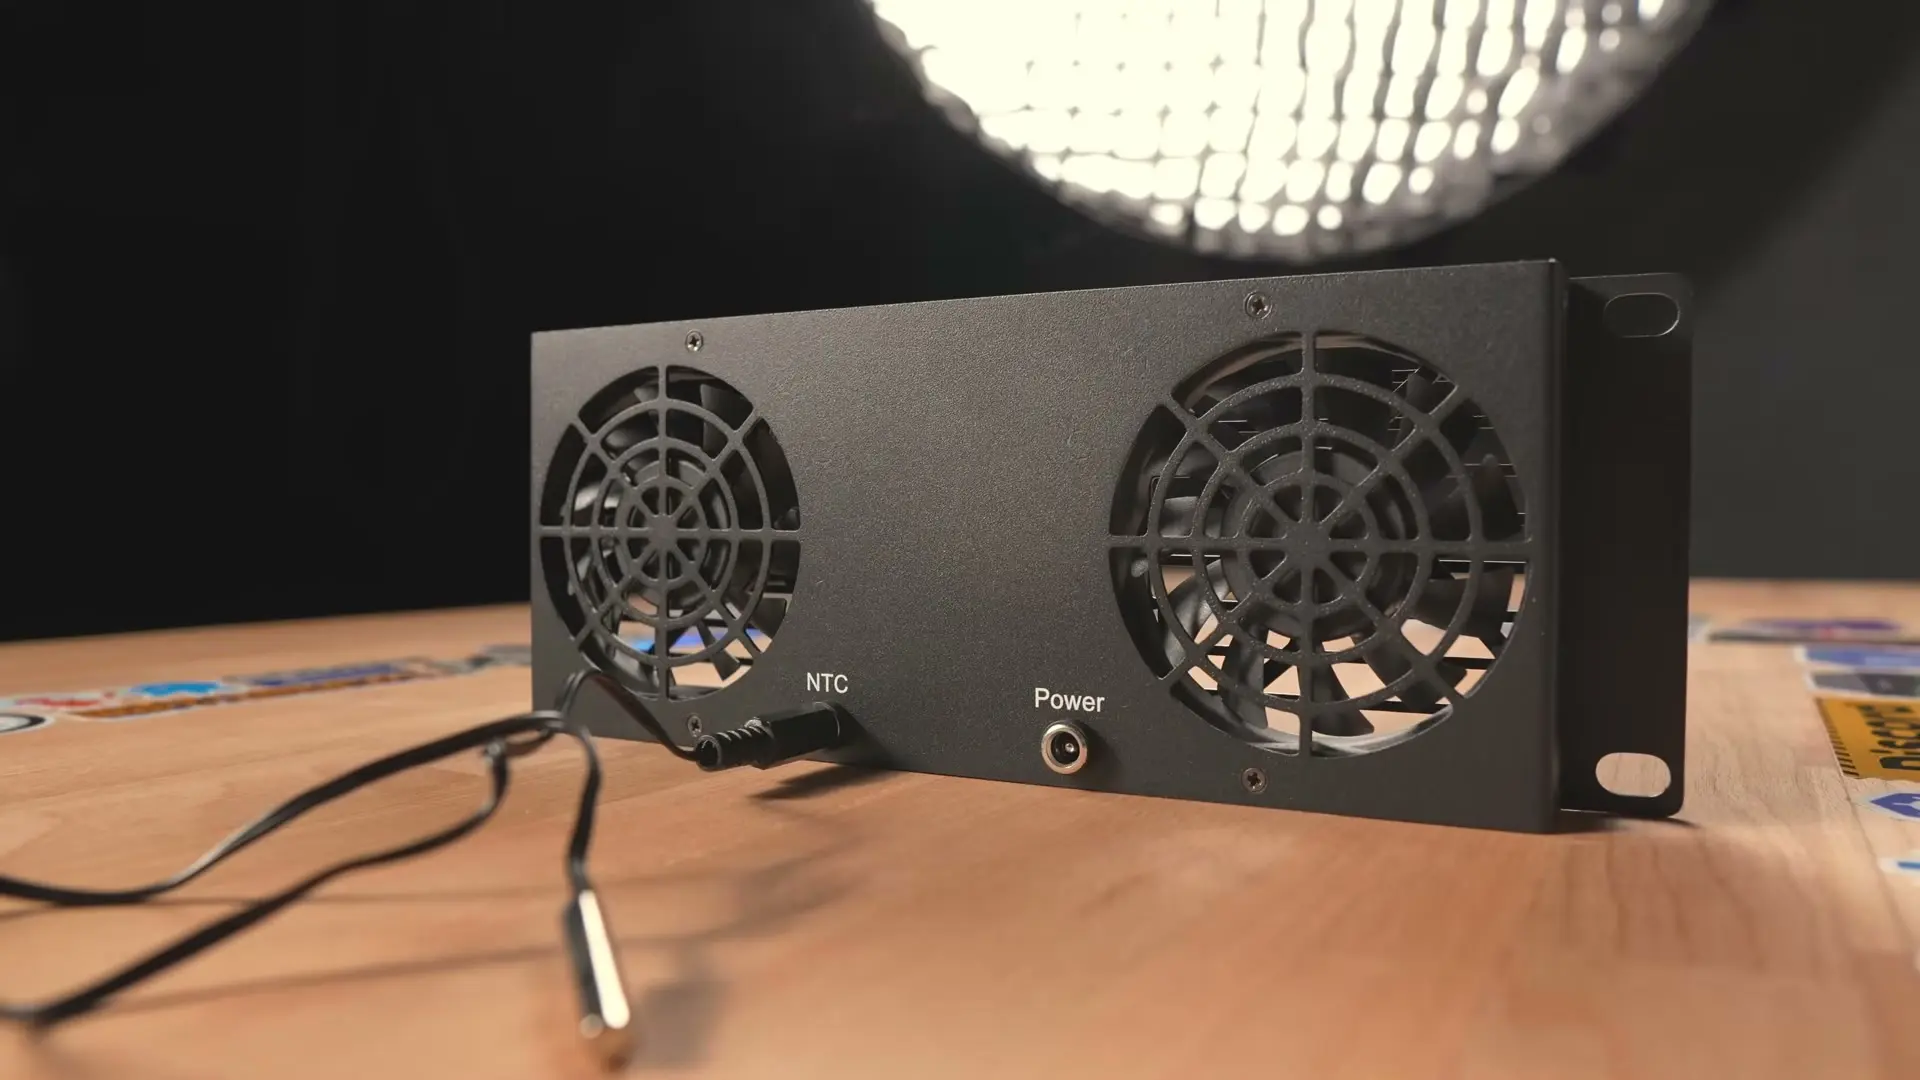
The 2U panel made more sense to me as a rear exhaust.
Patch panels and D-Series connectors
The RackMate includes a half-U patch panel. In theory, that leaves another half-U open for a shelf or another accessory.
In practice, two half-U accessories don’t always add up neatly to one rack unit.
The included patch panel and half-U shelf didn’t align perfectly and took slightly more room than expected. I had to shift the rest of the rack around to make everything fit.
I also tested a full 1U, 12-port keystone panel. It uses more vertical space, but it feels less cramped, has room for labels, and doesn’t leave you trying to make two half-U parts cooperate.
The full panel also gives you more room to mix connector types.
The bigger surprise was the D-Series panel.
D-Series openings can hold couplers for Ethernet, HDMI, USB-A, USB-C, XLR, BNC, coax, and plenty of other connections.
Instead of reaching behind the rack, you can bring the ports you use most often to the front.
I installed USB-A, USB-C, and HDMI modules.
I hadn’t seriously considered D-Series connectors for a homelab rack before this build. After using them, I’ll probably add them to future racks too, even if I mount the panel in the rear.
The finished panel looks clean, and connecting a temporary machine from the front is much easier than digging through the back of the rack.
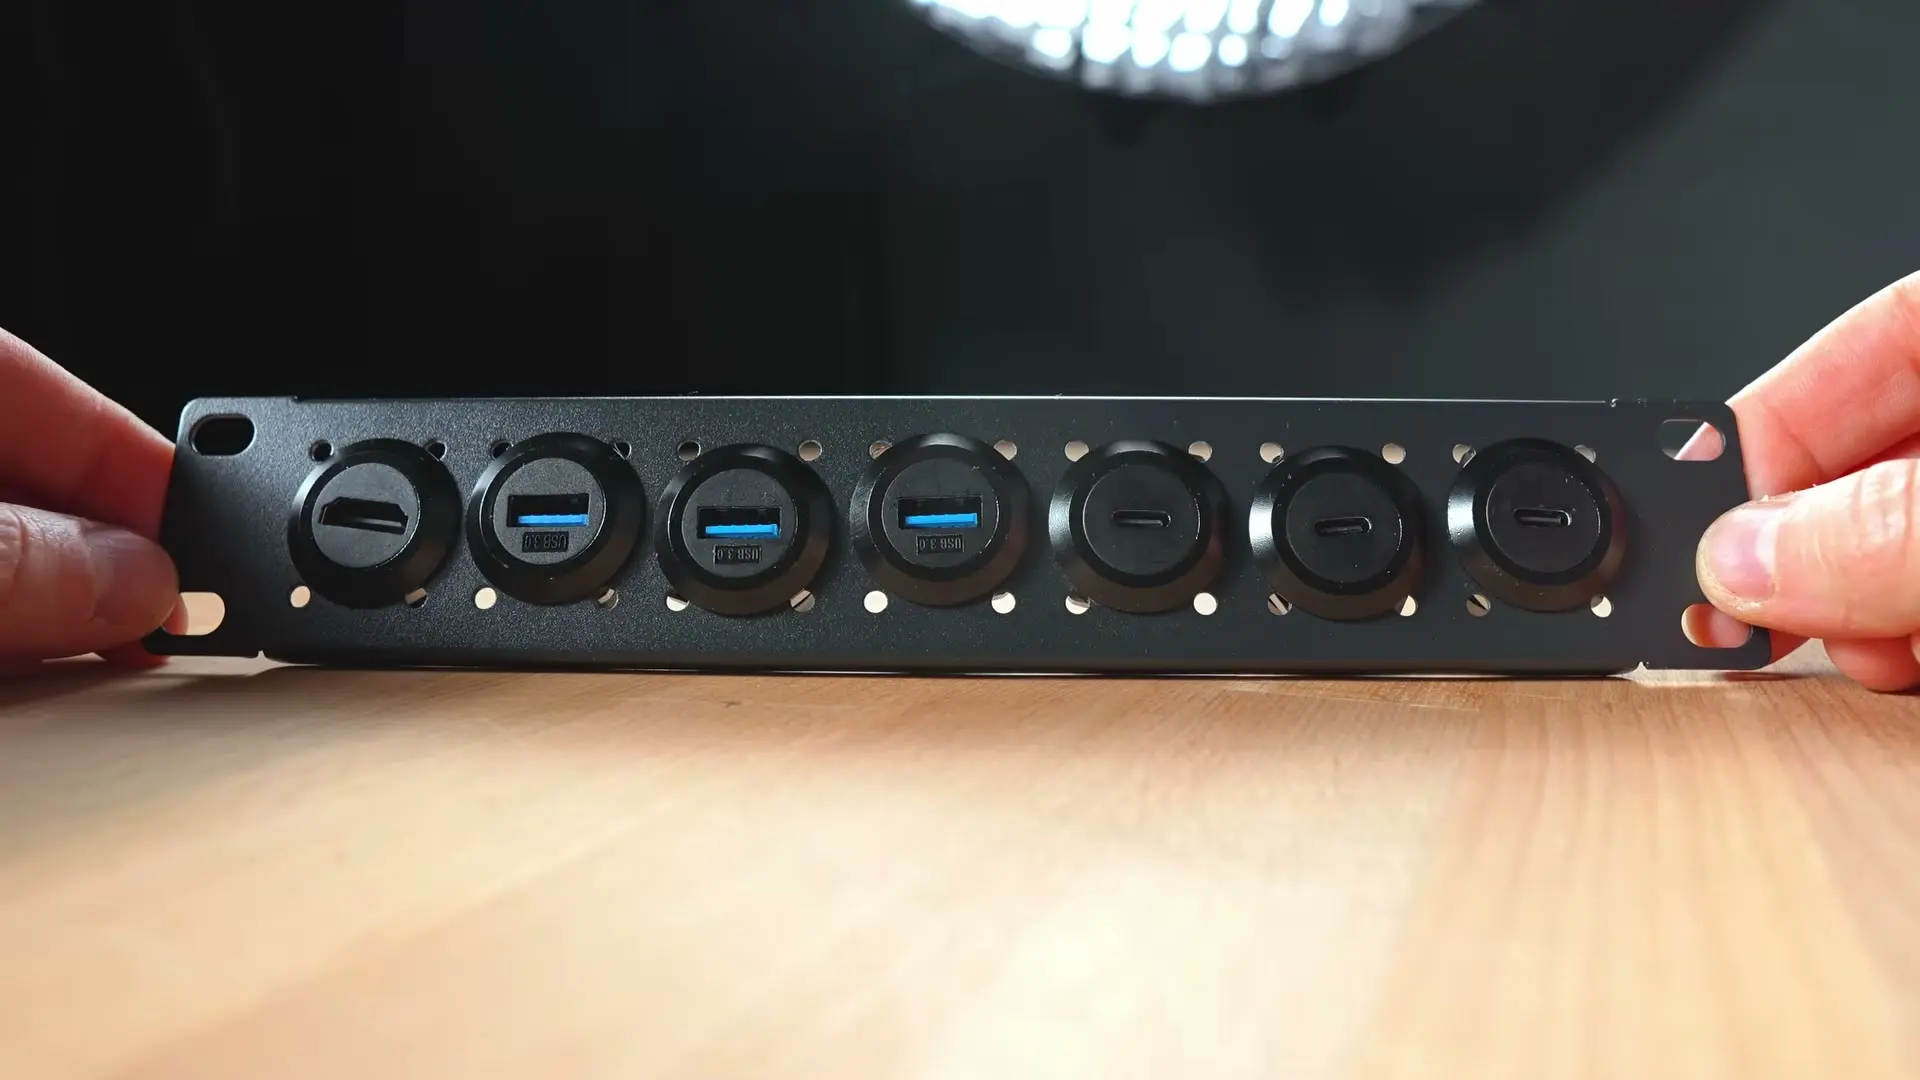
USB and HDMI where I can actually reach them.
The GL.iNet Comet X network KVM
I’ve tried several ways to manage multiple machines remotely. I previously connected a PiKVM to several computers, spent far too much time fixing PiKVM and TESmart compatibility problems, and later mounted six JetKVMs in a full-size rack.
The GL.iNet Comet X takes a different approach. It puts four KVM inputs, network access, local passthrough, storage, and a touchscreen into one box.
This was the standout product in the build.
First, it mounts natively in a 10-inch rack using the included ears.
Manufacturers don’t have to redesign every small product from scratch. If a device already fits within 1U and 10 inches, adding mounting points and rack ears may be enough.
The Comet X supports four devices at up to 4K and 30 frames per second. It can be powered by USB-C or PoE.
PoE is especially useful in a rack because it eliminates another power adapter.
The front has USB ports for a keyboard, mouse, storage device, or hub. It also has a touchscreen that can show settings and a live preview of the selected machine.
The preview isn’t essential, but it’s useful for checking whether a machine is alive before connecting the larger display.
There is an optional cloud service, but you can turn it off. I tested the KVM locally with cloud access disabled, and everything I needed still worked.
Firmware updates can be installed through the local browser interface too.
If you don’t want it reaching the internet at all, block it with a firewall rule.
Switching is slower than expected
Switching between machines took around six to eight seconds using the touchscreen, web interface, or physical control.
That isn’t a deal-breaker, but it is noticeable. The rest of the product feels polished enough that the delay stands out.
You can also lock the screen with a PIN. The behavior is a little odd because holding the physical button resets the KVM and clears the lock.
At least you’d know someone reset it because the PIN would be gone.
The web interface is fast and easy to use. I’d like quicker access to the on-screen keyboard for BIOS work and special key combinations, but that feels fixable in software.
Optional applications include Tailscale and ZeroTier. NetBird was listed on GL.iNet’s site, although I didn’t see it in the firmware I tested.
It also has 64GB of built-in eMMC storage. That’s enough room to keep Linux ISOs, recovery tools, and other files available to all four machines.
Local passthrough
Local passthrough is one of my biggest requirements for a smart KVM.
Remote access is great, but I still want to connect a real monitor, keyboard, and mouse when I’m standing in front of the rack.
The Comet X supports that and treats it like a real feature instead of something you’re expected to discover by accident.
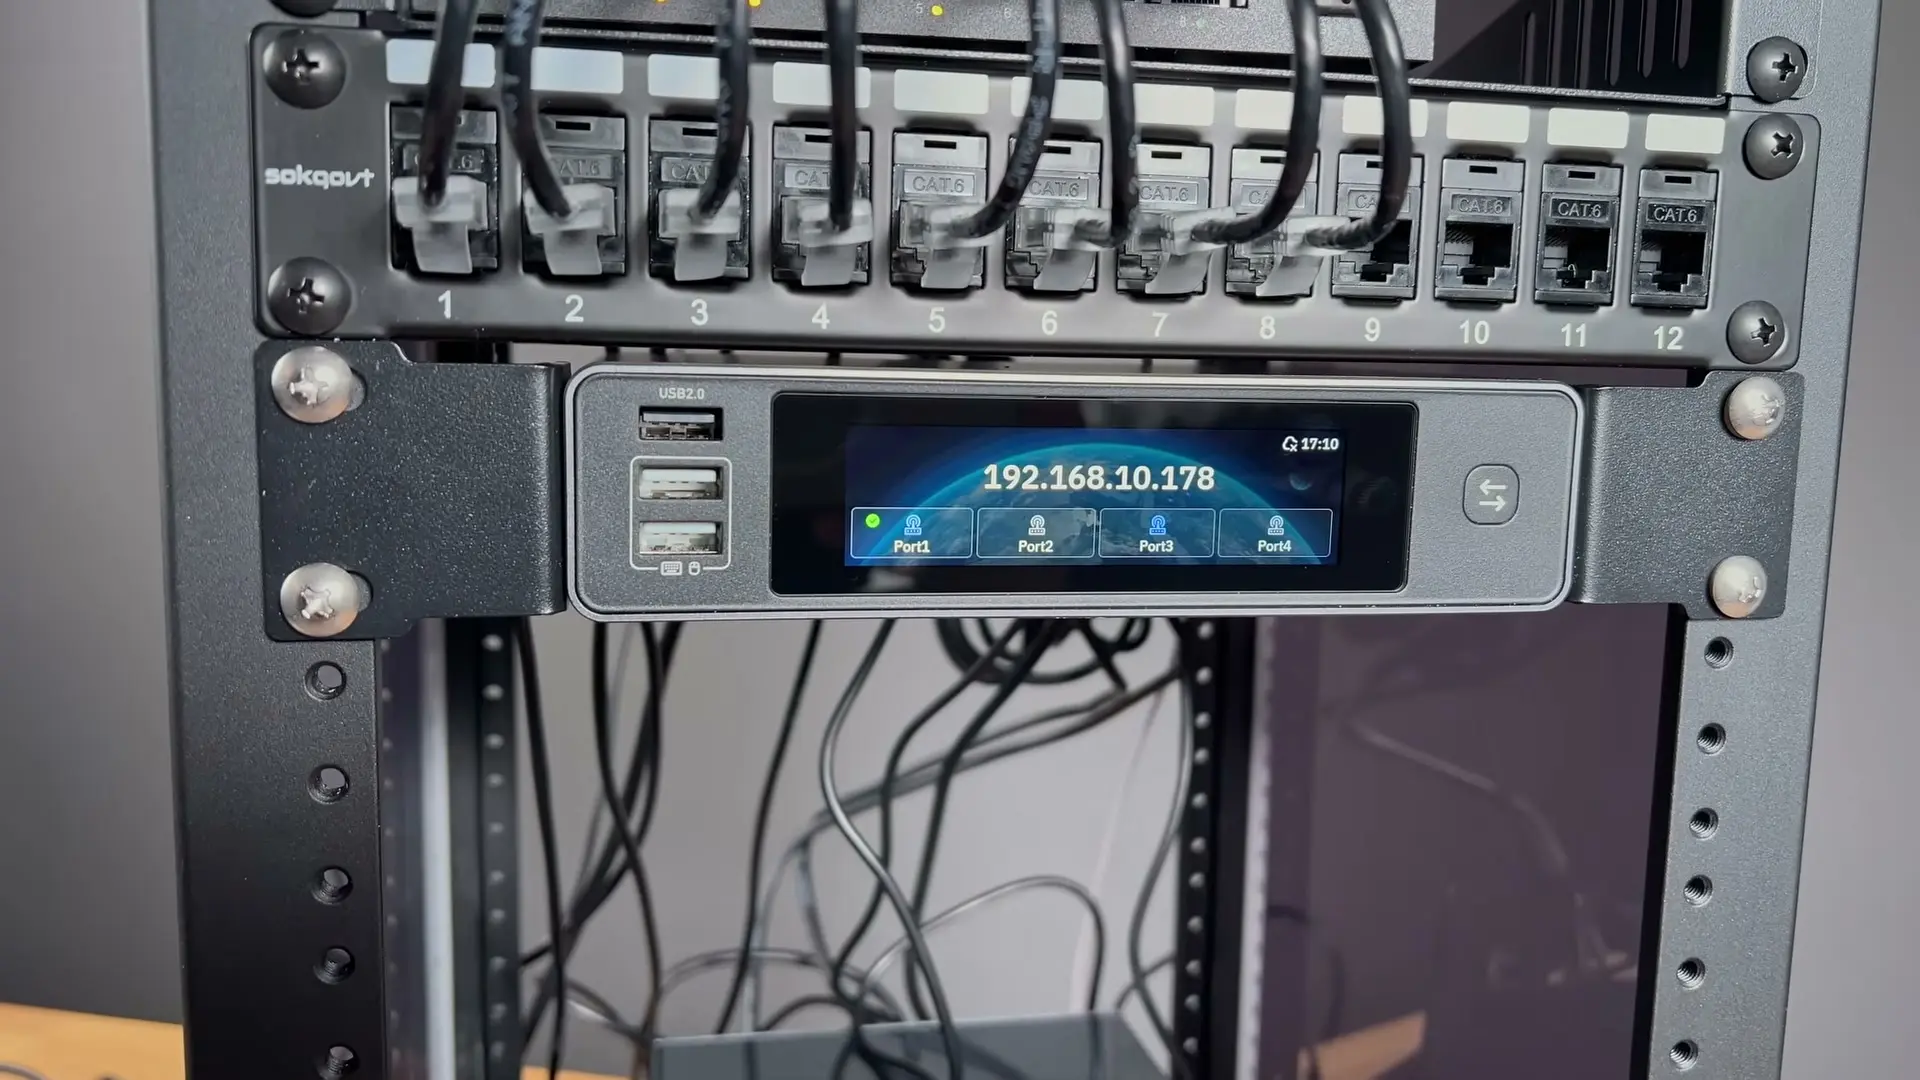
The Comet X looks like it was designed for this rack.
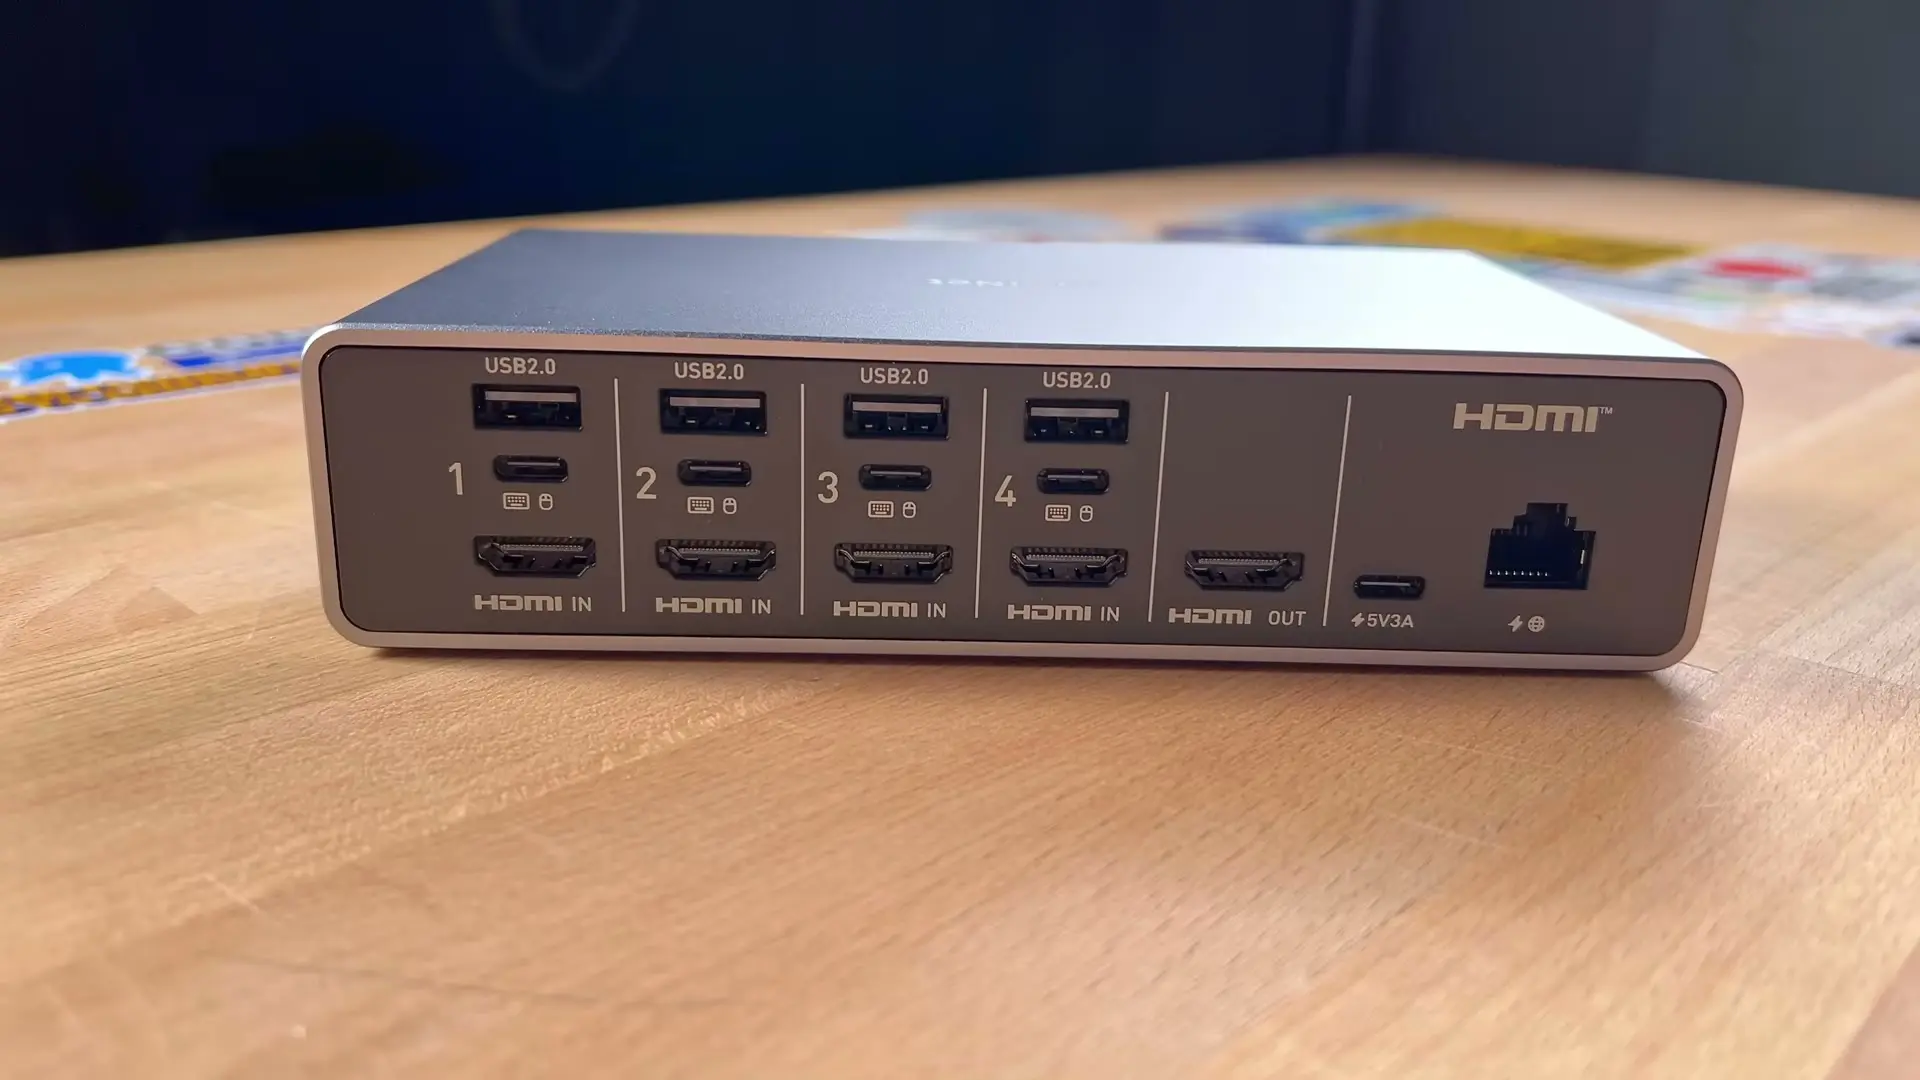
Four HDMI and USB inputs, plus local output, network, and power.
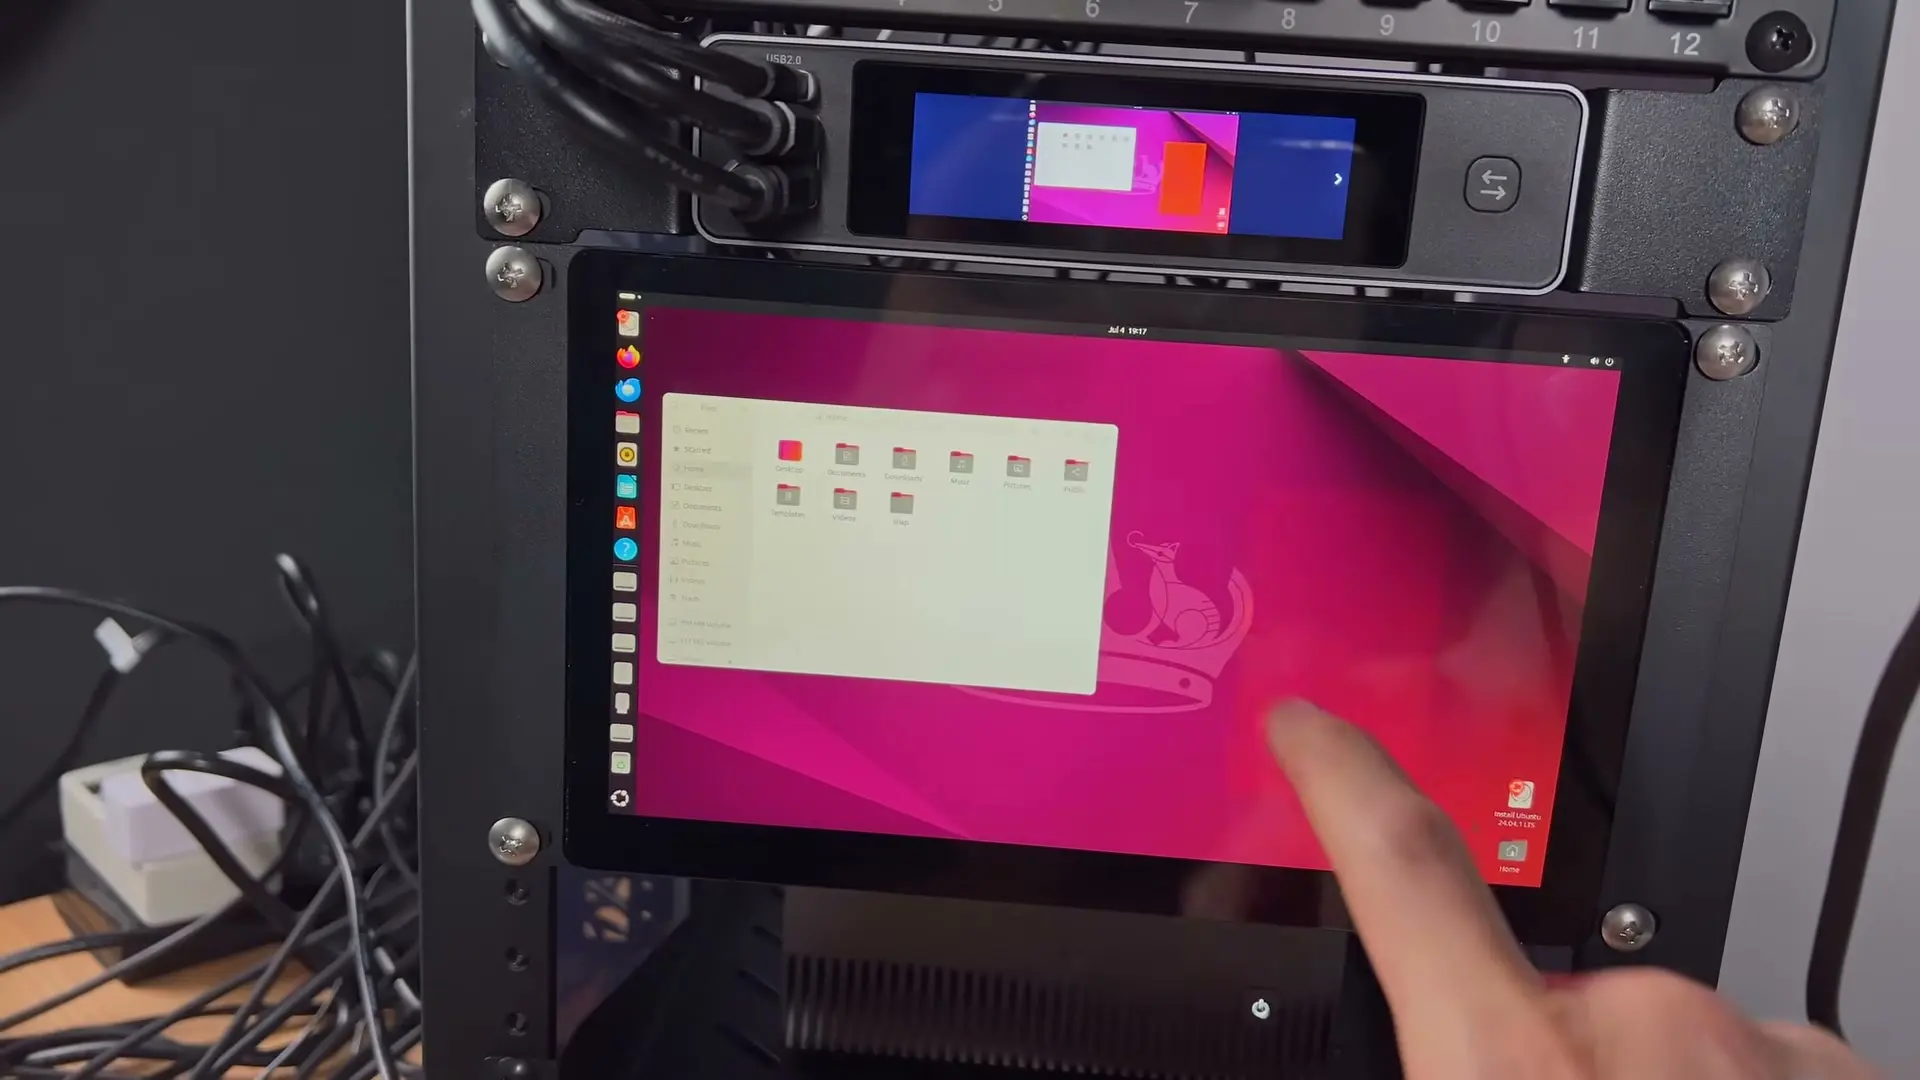
The built-in preview is small, but useful for a quick status check.
Rackmount displays and local control
To test local passthrough, I connected the Comet X to both of DeskPi’s rackmount touchscreens.
The larger model is a 9-inch, 3U display with a resolution of 1280 by 720. It connects over HDMI and has a dedicated 5-volt USB-C power port.
A second USB-C port handles touch input and power. There is also a 3.5-millimeter audio output for audio coming over HDMI.
The smaller display is 7.84 inches, takes up 2U, and uses a 1280 by 400 ultra-wide resolution.
Both look good in the rack, and touch worked on both.
The 9-inch display was easier to use for controlling a machine or showing a Home Assistant dashboard because it has more vertical space.
The 2U display works for status information, but 1280 by 400 is awkward for a lot of dashboards.
Grafana looked fine on both. Chrome recognized the touch input, so I could scroll and interact with dashboards in full-screen mode.
I connected three machines directly to KVM ports one through three. The fourth port went to the D-Series HDMI and USB connections on the front of the rack.
That gave me a temporary troubleshooting port for another machine.
I also used the front USB ports for a keyboard, mouse, and Ventoy drive. From there, I could enter the BIOS, change the boot order, or reinstall an operating system.
Local control worked exactly as expected. It was fast, supported multiple USB devices, and touch worked too.
Would I permanently give up 2U or 3U for a built-in display? I’m not sure.
Both displays look great, and they make sense in a portable rack, demo rack, or anything that needs a permanent local interface.
For my own rack, I often prefer a portable USB-powered ASUS display. I can connect it when I need it, then use it with my laptop afterward.
It also costs about the same.
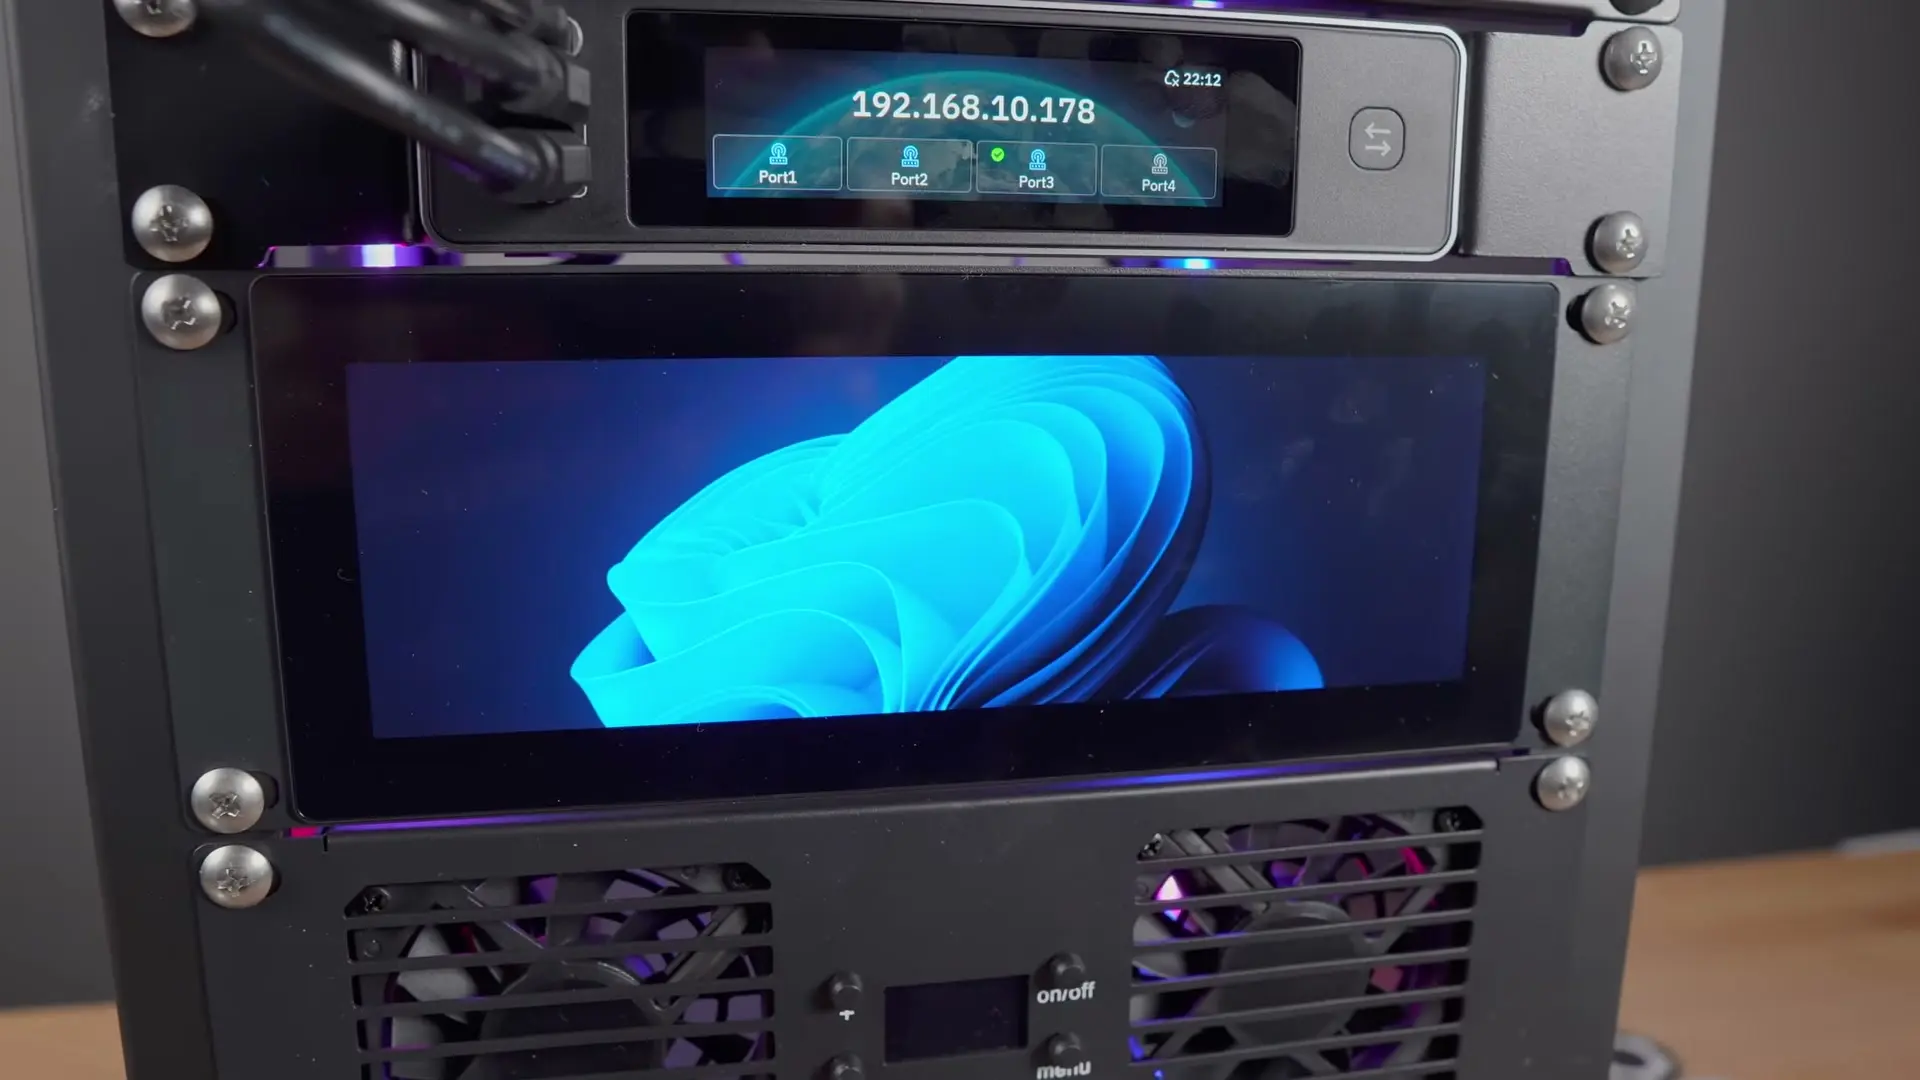
The 9-inch display is much easier to use than the ultra-wide 2U model.
Power is where the rack gets messy
I left power until the end because it became one of the hardest parts of the build to clean up.
A mix of AC adapters, USB-C devices, DC barrel connectors, and different voltages can turn a nice rack into a rat’s nest very quickly.
I tried to find one power standard that could handle everything.
There isn’t one.
The right setup depends on the hardware.
A 10-inch AC PDU
The simplest option is a 10-inch AC PDU. Plug in each device using its normal adapter and call it done.
This PDU has four outlets, which is about all you can fit across a 10-inch rack.
Large wall adapters can block the outlets next to them, so I use short outlet-saver extension cords. They move the bulky adapter away from the PDU and free the neighboring outlet.
I mounted the PDU behind the UPS with the outlets facing outward. That let me hide several cords in the same area while keeping the outlets reachable.
Cable management
I reused standard rack D-rings from my larger rack. Mini racks still use normal rack-unit spacing, so they fit perfectly.
Two D-rings created a vertical cable channel, and reusable Velcro kept the bundles together.
A roll of Velcro is still one of the best things you can buy for a rack. It’s cheap, easy to cut, and much easier to redo than zip ties.
USB-C chargers
My first instinct was to move as many devices as possible to USB-C.
I tested a SABRENT eight-port charger that I bought after seeing it on Jeff Geerling’s channel. Thanks, Jeff.
The charger is powerful, and the display is useful, but the physical design is awkward in a rack.
When it sits flat, the cables shoot upward and outward like a sprinkler.
You can wall-mount it, but that didn’t help much here. A more conventional GaN charger was easier to cable because all of the ports were on one side.
Pay attention to how multiport chargers advertise wattage. The largest number on the box may be the total across every port, not what one port can provide.
A charger labeled 200 watts won’t necessarily provide 200 watts to one laptop. Check the per-port limits and what happens when several ports are in use.
Measuring USB power
A USB power meter is useful for checking whether USB Power Delivery negotiated correctly. It shows the actual voltage, current, and wattage instead of leaving you to guess.
I also tried a UGREEN 240-watt USB-C cable with a small display built into the connector.
It isn’t a replacement for a real meter, but it gives you a quick estimate without adding another tester.
VFLEX: USB-C Power Delivery to DC
Devices that already use USB-C are easy. The harder part is all the hardware that still uses DC barrel connectors.
Werewolf’s VFLEX converts USB-C Power Delivery into a configurable DC output.
You connect the VFLEX base to a phone, open the app, choose the output voltage, and attach the correct barrel cable.
The device on the other end does not negotiate with VFLEX. It receives whatever voltage you programmed.
Before connecting anything, check the original adapter for voltage, connector size, polarity, and current.
If the device expects 5 volts, set VFLEX to 5 volts. If it expects 12 volts, set it to 12 volts. Make sure the connector fits and that the USB-C source can provide enough power.
I would also verify the output with a meter before connecting expensive hardware.
Several devices in this rack used 12 volts, including the fan panels and a ZimaBoard 2. VFLEX becomes more interesting when it replaces a pile of random wall adapters instead of just one.
The downside is the app dependency. If the app disappears, so does your ability to reconfigure the base.
Update: Tundra Labs does provide lib.vflex.app, an open-source CLI and web app for configuring VFLEX locally.
A manual USB-C-to-DC trigger cable
I also tested a USB-C-to-DC cable that works on the same basic idea.
Connect it to USB-C power, press the button to choose a voltage, attach the correct barrel tip, and then connect the device.
You still need to match the original adapter’s voltage, connector, polarity, and power requirements.
Choose the voltage before plugging it into the device. The wrong setting can damage it.
The cable costs around $15 and comes with a large selection of barrel tips. Even though the voltage is shown on the display, I’d still verify the output before connecting anything.
This feels more like a toolkit item than a permanent power solution.
Keep it in a drawer or bag, and it can probably power whatever random barrel-jack device shows up next.
For a permanent installation, VFLEX is cleaner because once it’s programmed, you don’t have to worry about bumping a button and changing the voltage.
DeskPi DC PDU Lite
I hoped DeskPi’s DC PDU could replace several power bricks for devices with different voltage requirements.
It can’t.
It distributes one input voltage rather than converting it.
Whatever voltage goes into the PDU comes out of all seven channels.
It supports up to 24 volts and 8 amps total, with limits on each channel. The outputs can be switched individually, and devices can connect from either the front or rear.
It works well when several devices share the same voltage and polarity.
A group of 12-volt mini PCs, fan panels, and other 12-volt accessories could all share one 12-volt source.
The use case is narrower than I expected because every connected device has to match.
I also tested a hybrid setup: USB-C Power Delivery into VFLEX, VFLEX configured for 12 volts, then 12 volts into the DC PDU and out to several devices.
It’s a little wild, but it gives you USB-C as the upstream power source while keeping simple DC cables inside the rack.
Just remember that the PDU distributes voltage. It doesn’t convert it.
PoE
PoE is another option.
You can use a PoE switch with PoE-to-USB-C or PoE-to-DC splitters at each device.
It works well for one or two devices, but the splitters become hard to hide once you add more.
In one of my previous builds, I powered two entire mini network racks from one PoE switch port and a single Ethernet cable. It can be done.
The catch is that these splitters usually have fairly low voltage and power limits, so they won’t work for everything.
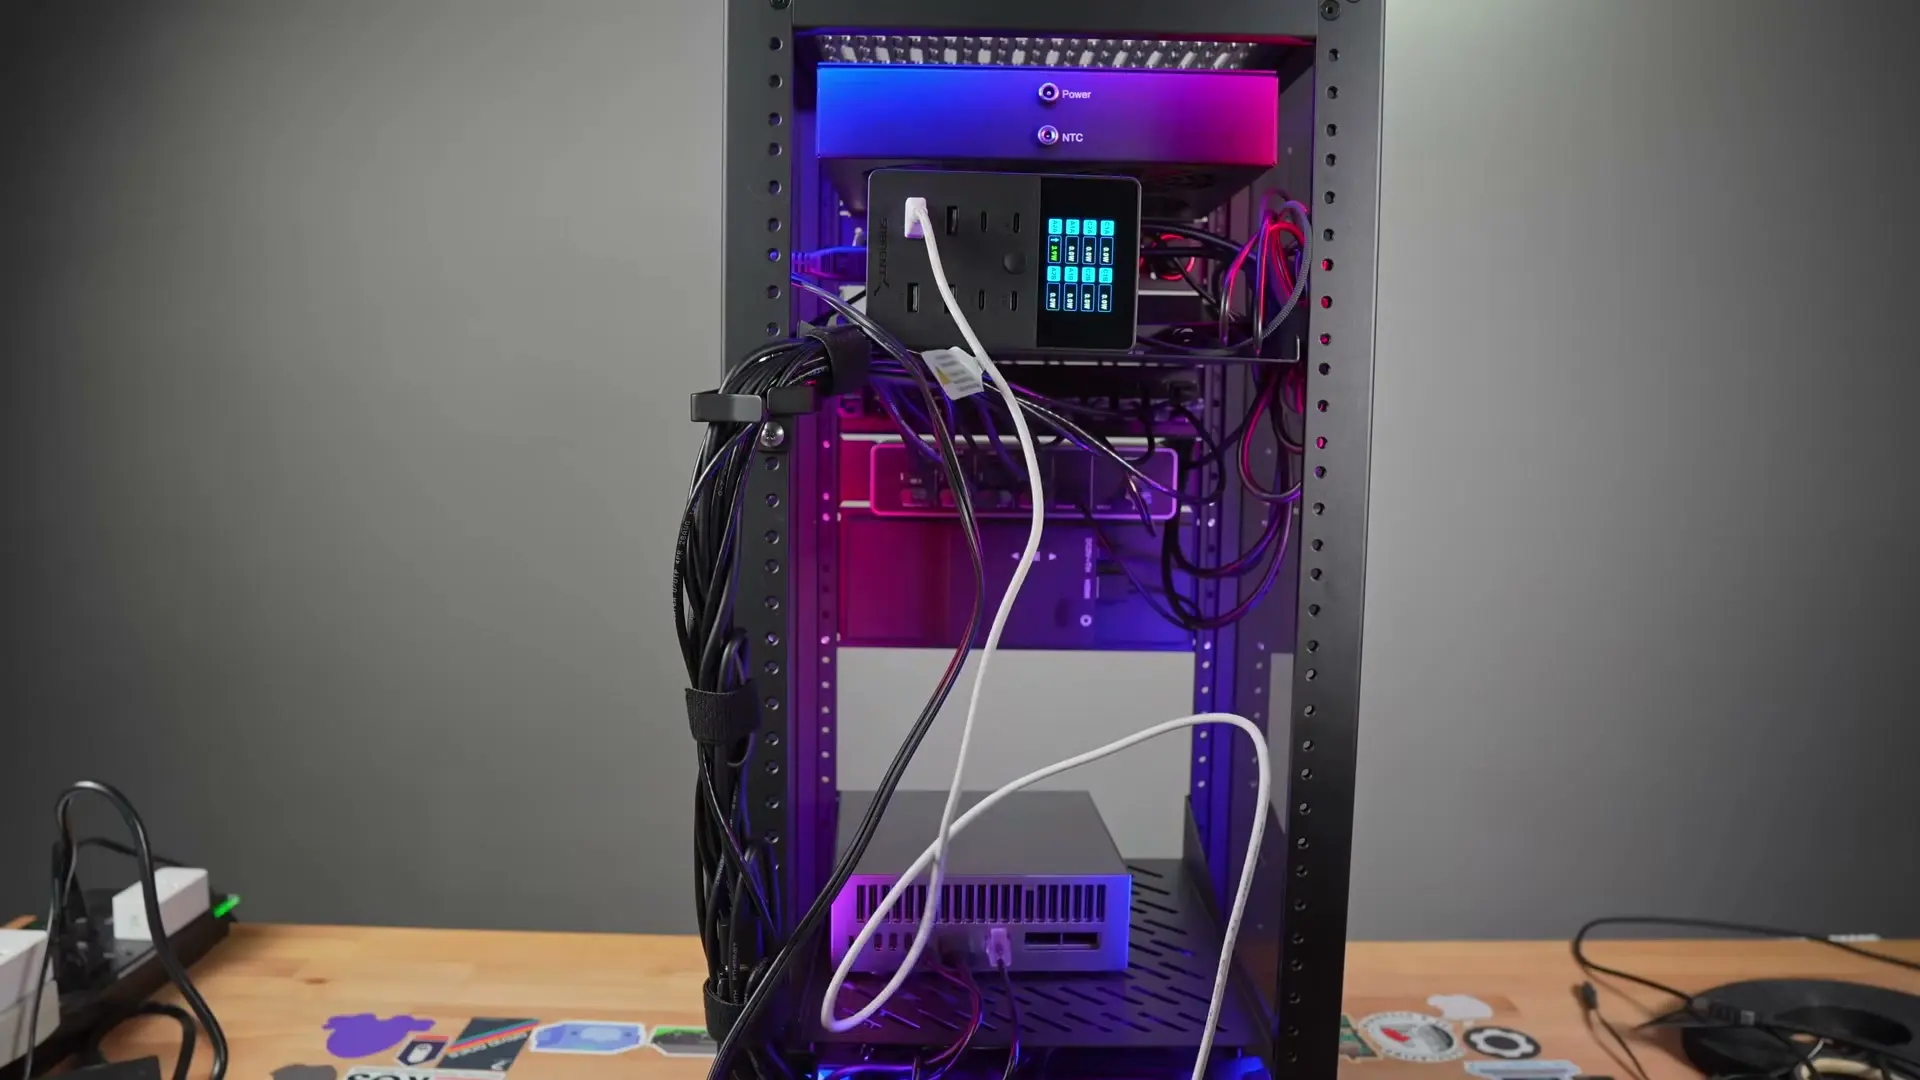
Planning power management and cabling is a project in itself.
What actually worked
This rack ended up using AC, USB-C, DC, and PoE.
I stopped trying to force everything onto one power standard once that started adding more adapters than it removed.
That is especially true for machines like the ASUS GX10 systems I used for my local AI cluster, which need far more USB-C power than a typical multiport charger can provide.
The simplest accessories made the biggest difference.
The casters made the rack easier to build. D-rings and Velcro kept the wiring under control. The D-Series panel gave me a front-mounted troubleshooting port I’ll actually use.
The Comet X was the one product that felt purpose-built for a 10-inch rack.
Some of the other gear needs another pass. The fan panels need more airflow, the half-U accessories need better tolerances, and the UPS is still a desktop unit that happens to fit inside a rack.
I’ll still 3D print mounts for odd hardware, but I no longer have to fabricate every other part of the build.
Compared with my first mini rack, there are finally enough off-the-shelf accessories to build something clean and practical without turning the whole project into a fabrication exercise.
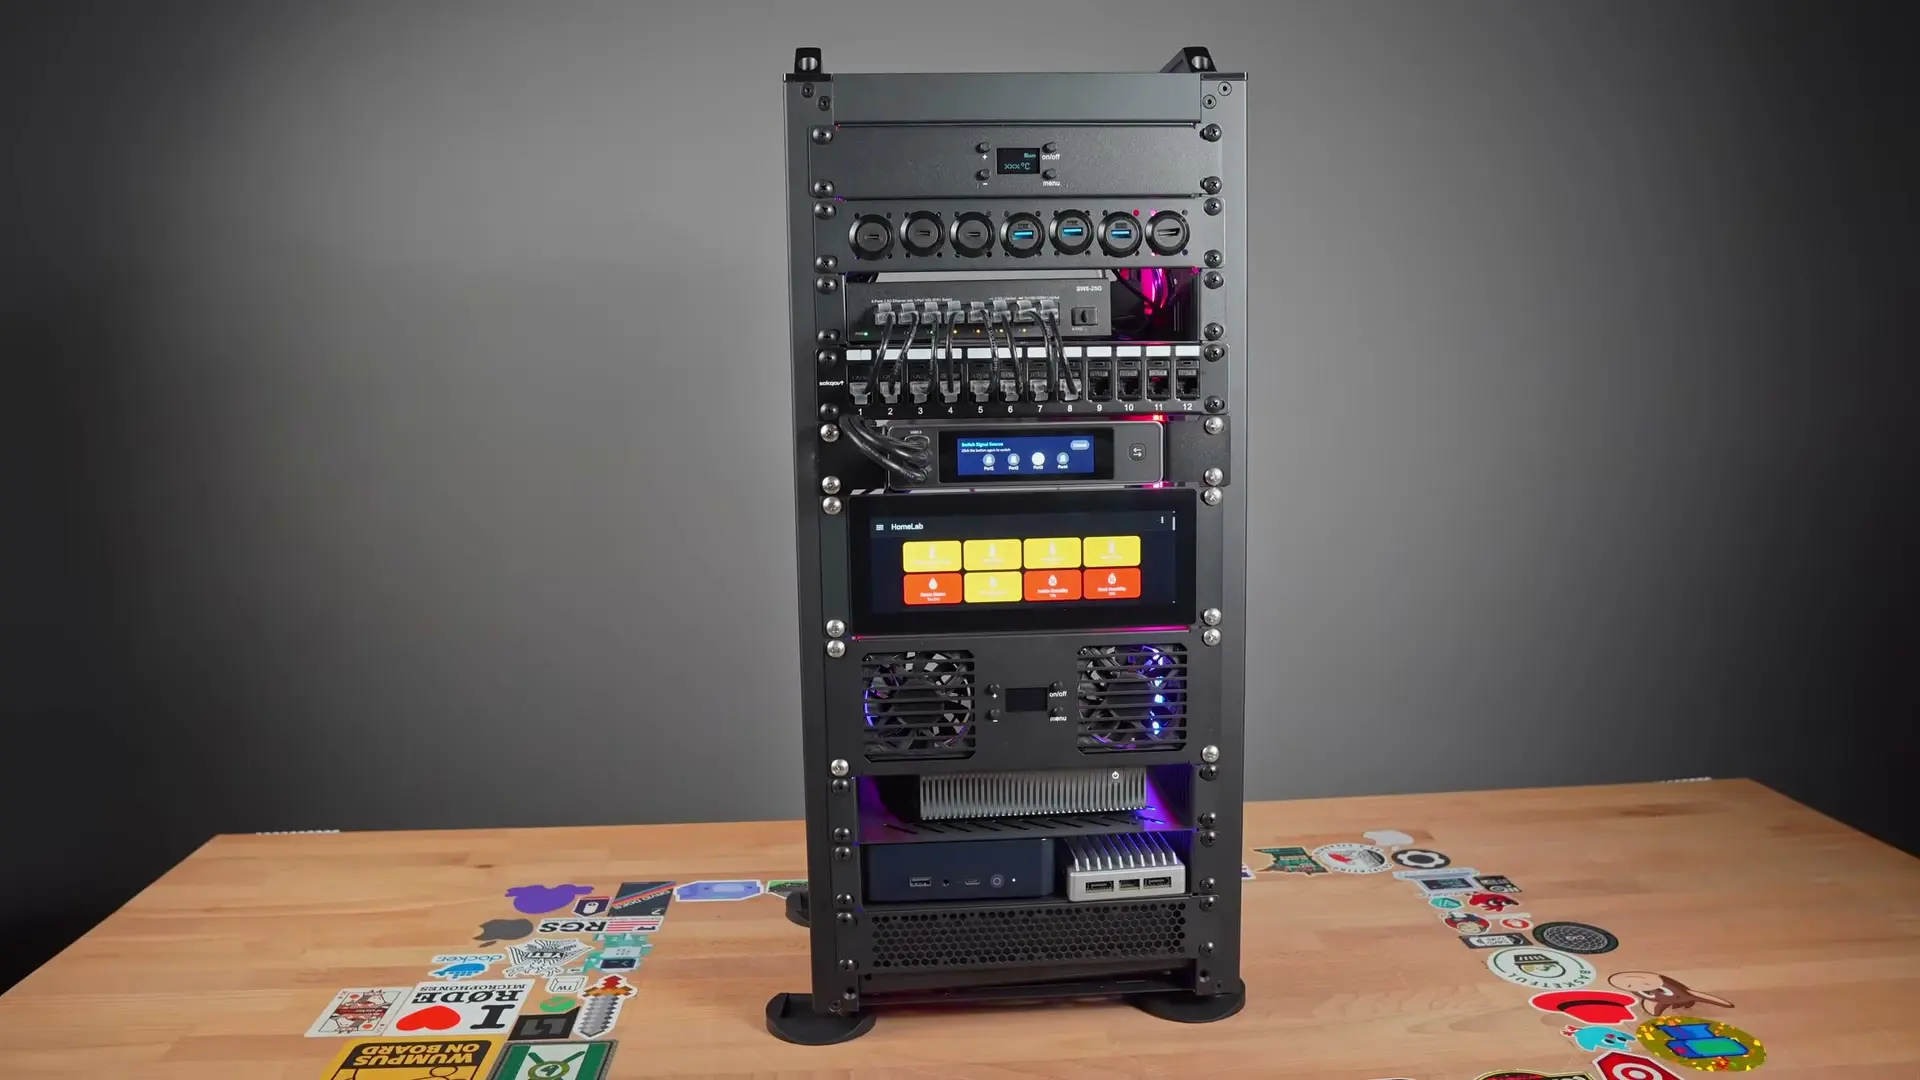
Here’s the finished rack.
Where to Buy
The following links may be affiliate links, and I may earn a small commission at no extra cost to you.
Rack and mounting
- DeskPi RackMate T2 12U mini rack
- D-ring hooks
- Velcro
- Short Cat6 patch cables
- #10-32 rack screws
- DeskPi 10-inch 1U rack shelf
- DeskPi 10-inch 0.5U rack shelf
- 0.5-inch M4 x 15 threaded-stem casters
- 3 x 3-inch rubber caster cups, four-pack
- DeskPi 10-inch vented blank panels
- DeskPi 10-inch solid blank panels
Power
- Tripp Lite cloud-connected 600VA UPS
- Tripp Lite non-cloud 600VA UPS
- 10-inch rack PDU with surge protection
- Eight-inch three-prong outlet-saver extension cords
- SABRENT VOLTIK 252W USB-C/USB-A desktop charger with display
- USB-C GaN charger
- Klein Tools USB-A/USB-C power meter
- UGREEN 100W USB-C to USB-C cables
- UGREEN 240W USB-C cable with digital wattage display
- Werewolf VFLEX USB-C PD-to-DC kit
- USB-C PD-to-barrel trigger cable kit
- GeeekPi DC PDU Lite seven-channel 0.5U power distribution unit
- PoE-to-USB-C splitter
- PoE-to-12V barrel power splitter
Lighting
Cooling, patching, and displays
- DeskPi 10-inch 2U dual-fan cooling panel
- 12-port 10-inch blank keystone patch panel
- Cat6 RJ45 keystone couplers
- GeeekPi 10-inch 1U seven-port D-Series panel
- D-Series USB-A and USB-C panel-mount modules
- USB-C coupler
- USB-A to USB-C adapter
- D-Series HDMI panel-mount module
- DeskPi 9-inch 3U rackmount touchscreen
- ASUS USB-C monitor
- ZimaBoard 2
Remote access
Additional non-affiliate links
Related mini rack and KVM projects
- Mini Rack, HomeLab Stack
- The MINI Network RACK Ubiquiti should make
- Using the Raspberry Pi PiKVM with Multiple Machines
- PiKVM with TESmart KVM Fixed!
- 6 JetKVMs, 1 Rack
🤝 Support the channel and help keep this site ad-free
⚙️ See all the hardware I recommend at https://l.technotim.com/gear